Everything You Need Before You Walk to Machu Picchu
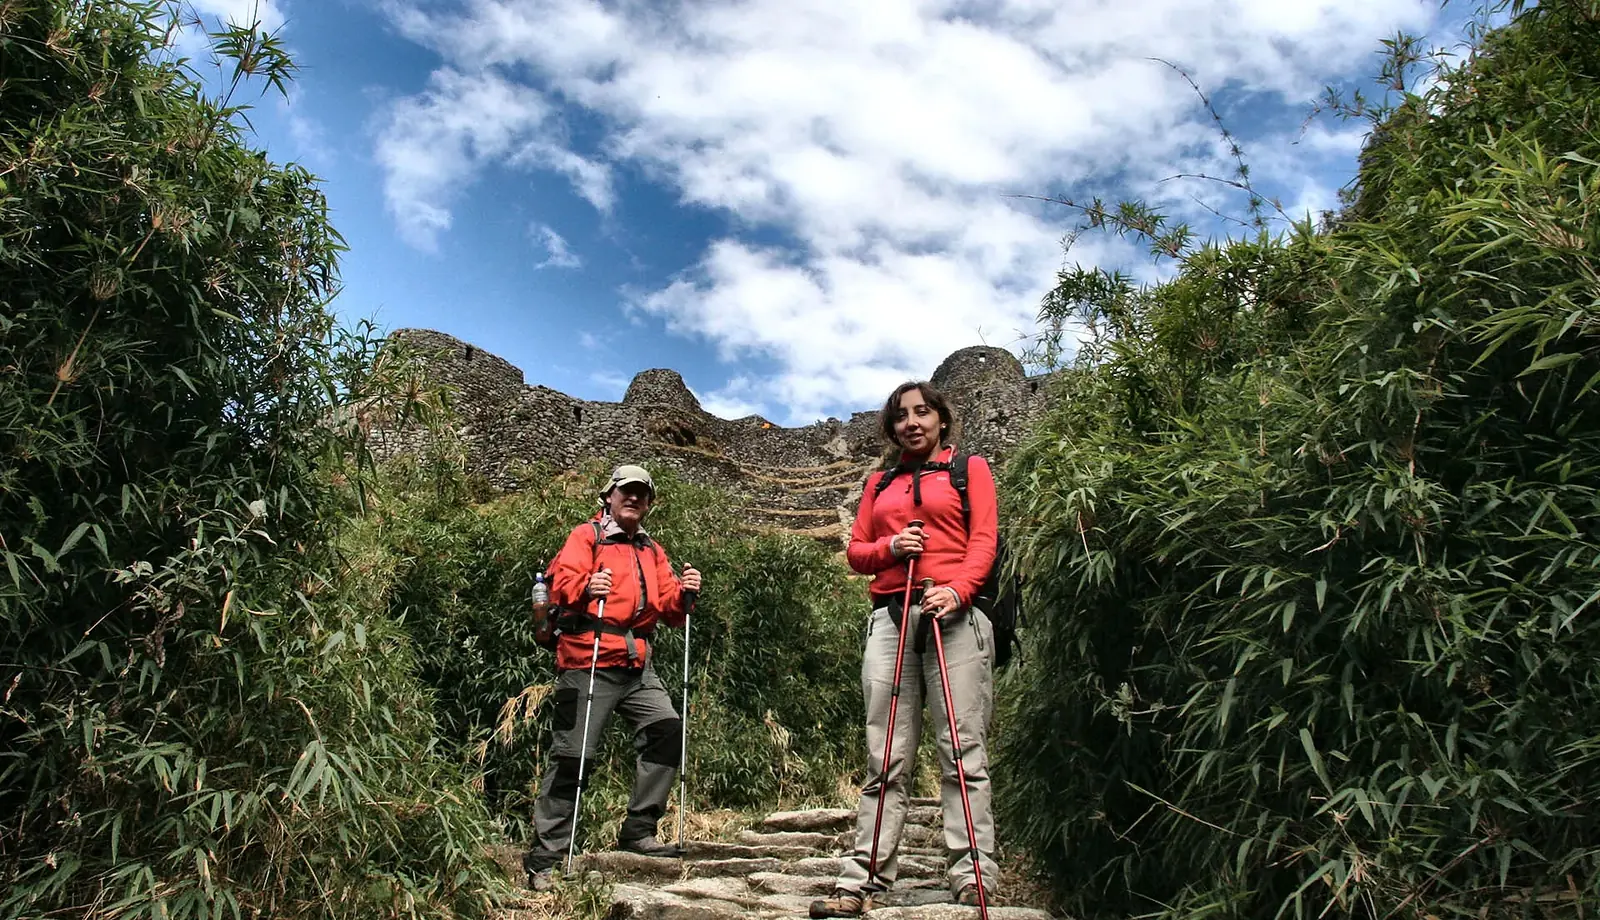
The Classic Inca Trail is a four-day walk of about 33.4 km along original Inca paths, over Dead Woman’s Pass at 4,207 m a.s.l. (13,802 ft) and into Machu Picchu through the Sun Gate. That is why this guide gathers what we tell every traveler before they come: the route, how each day feels, how to train, what to carry and how to handle altitude.
Information updated October 2026. Access conditions, schedules, fees, circuits and regulations can change, so please verify current conditions before your trip.
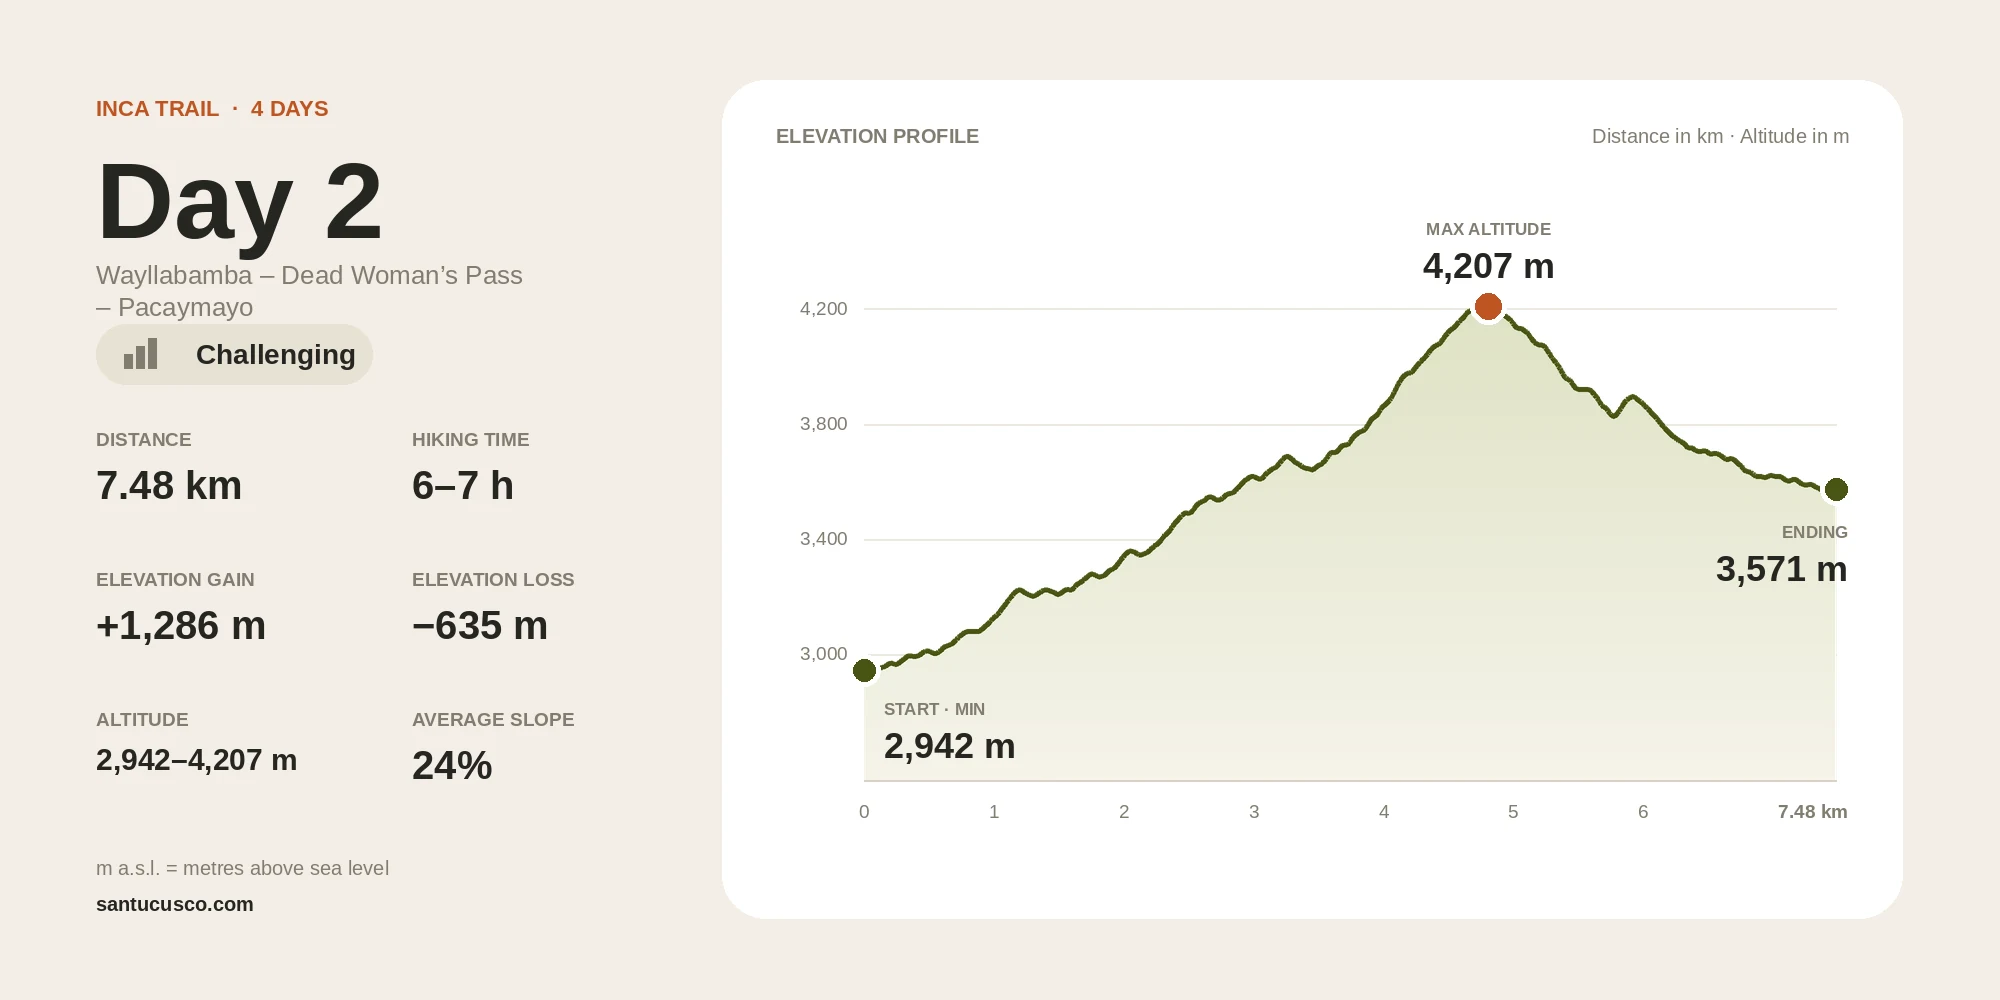
The trail climbs to 4,207 m a.s.l. (13,802 ft) on day 2, then descends toward Machu Picchu.
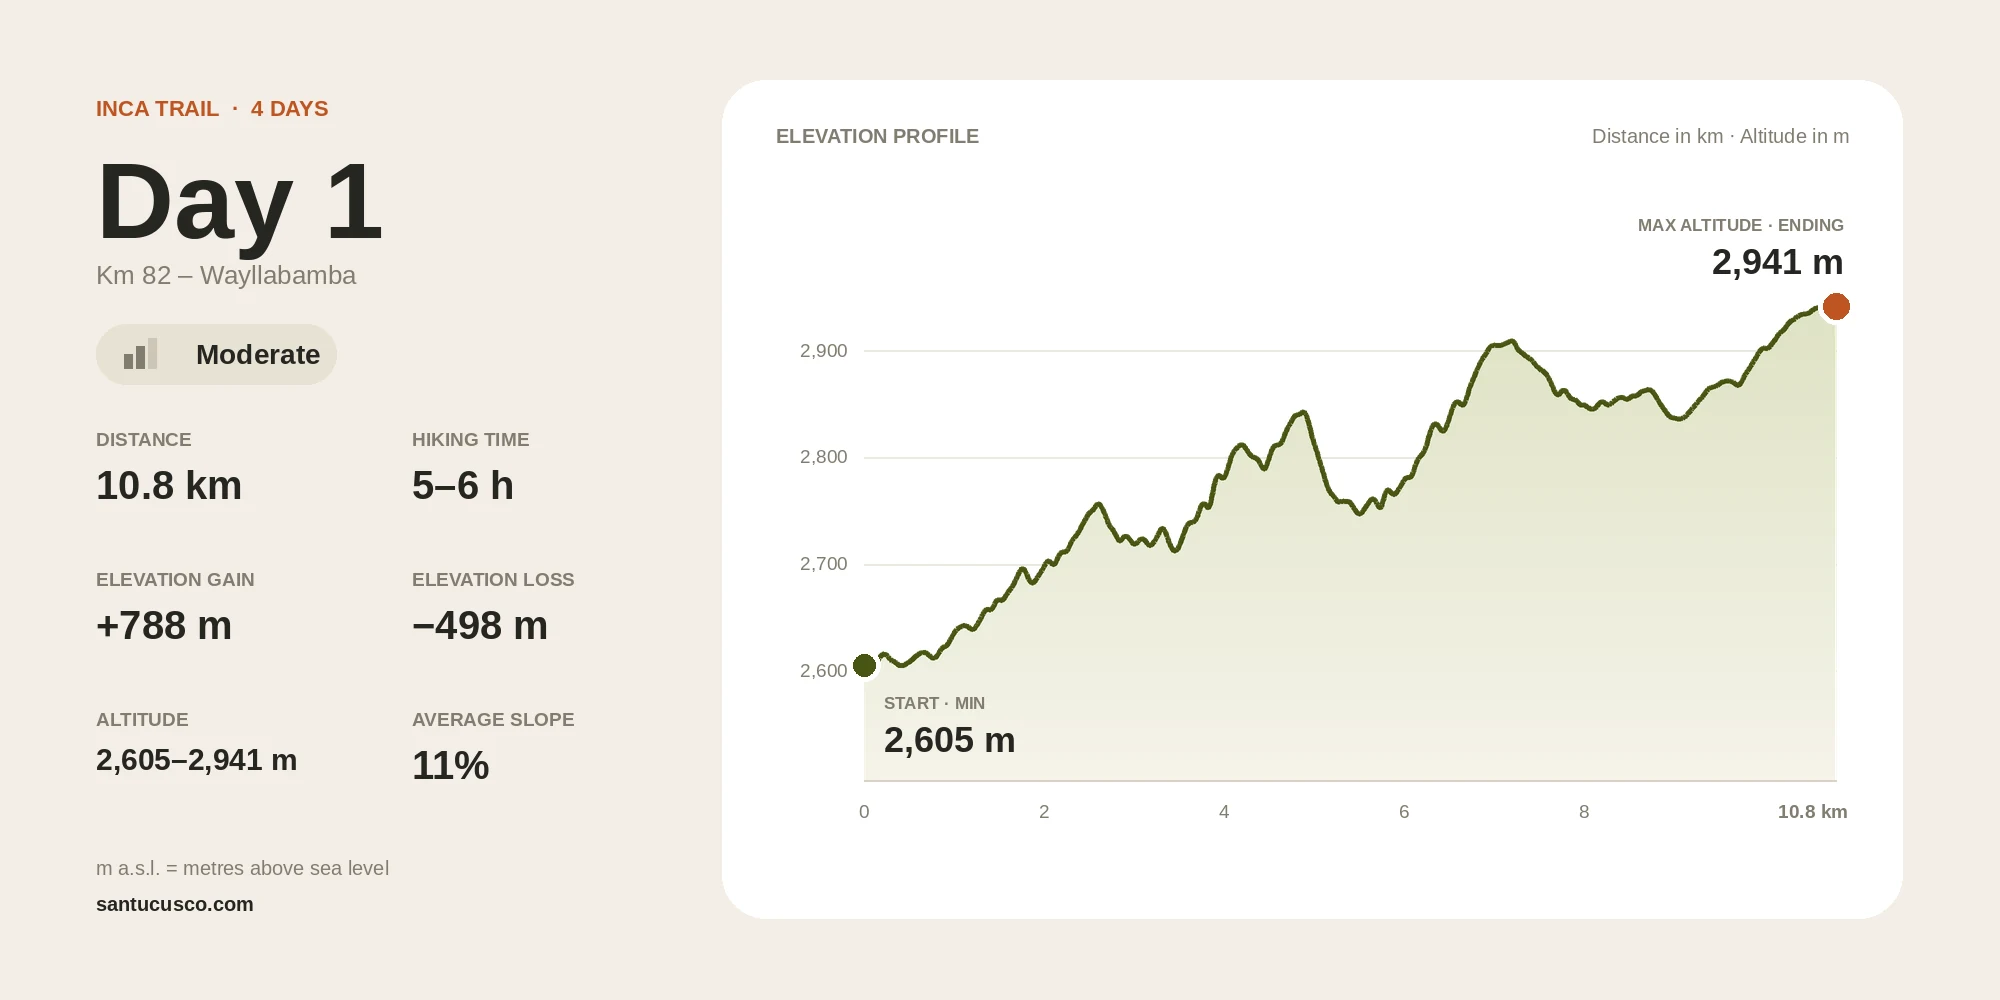
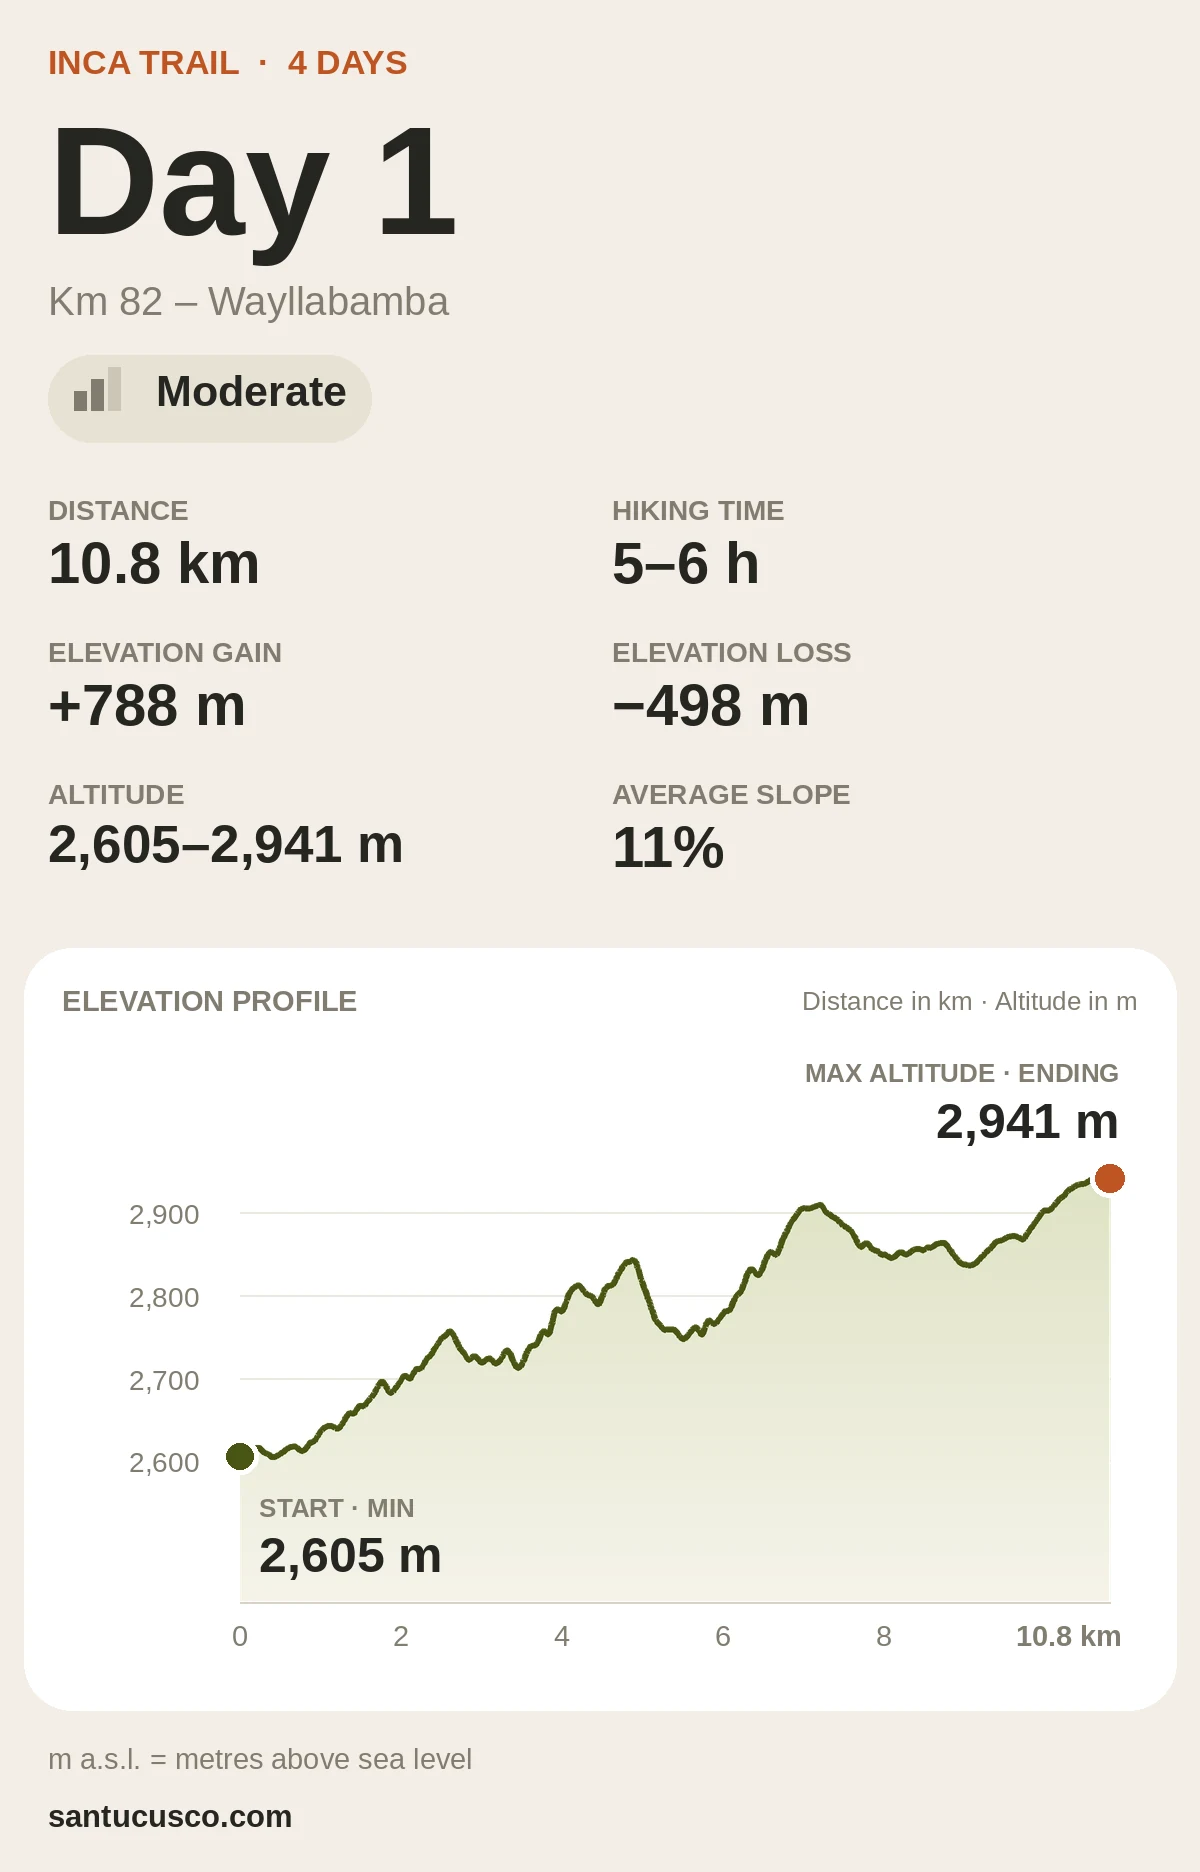
Day 1
10.8 km
5–6 h
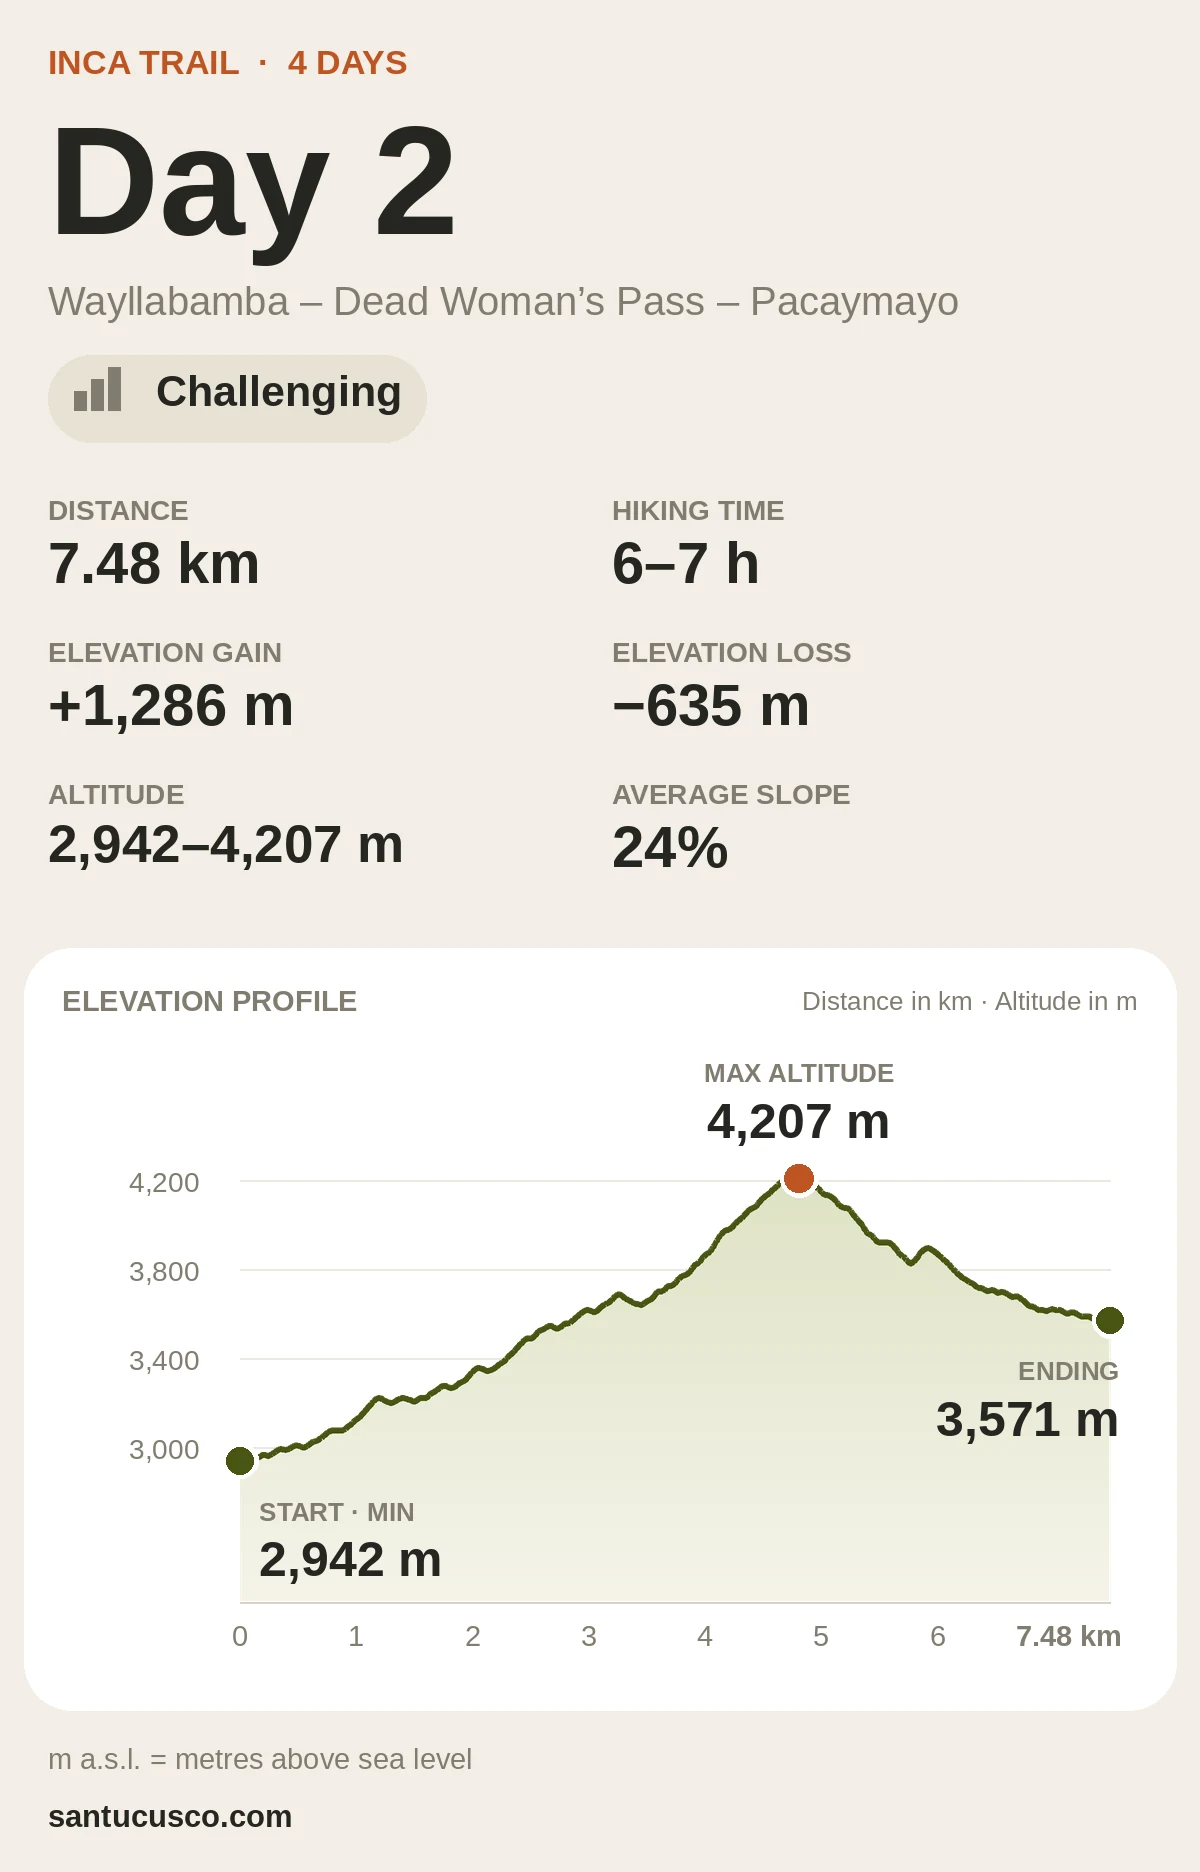
Day 2
7.48 km
6–7 h
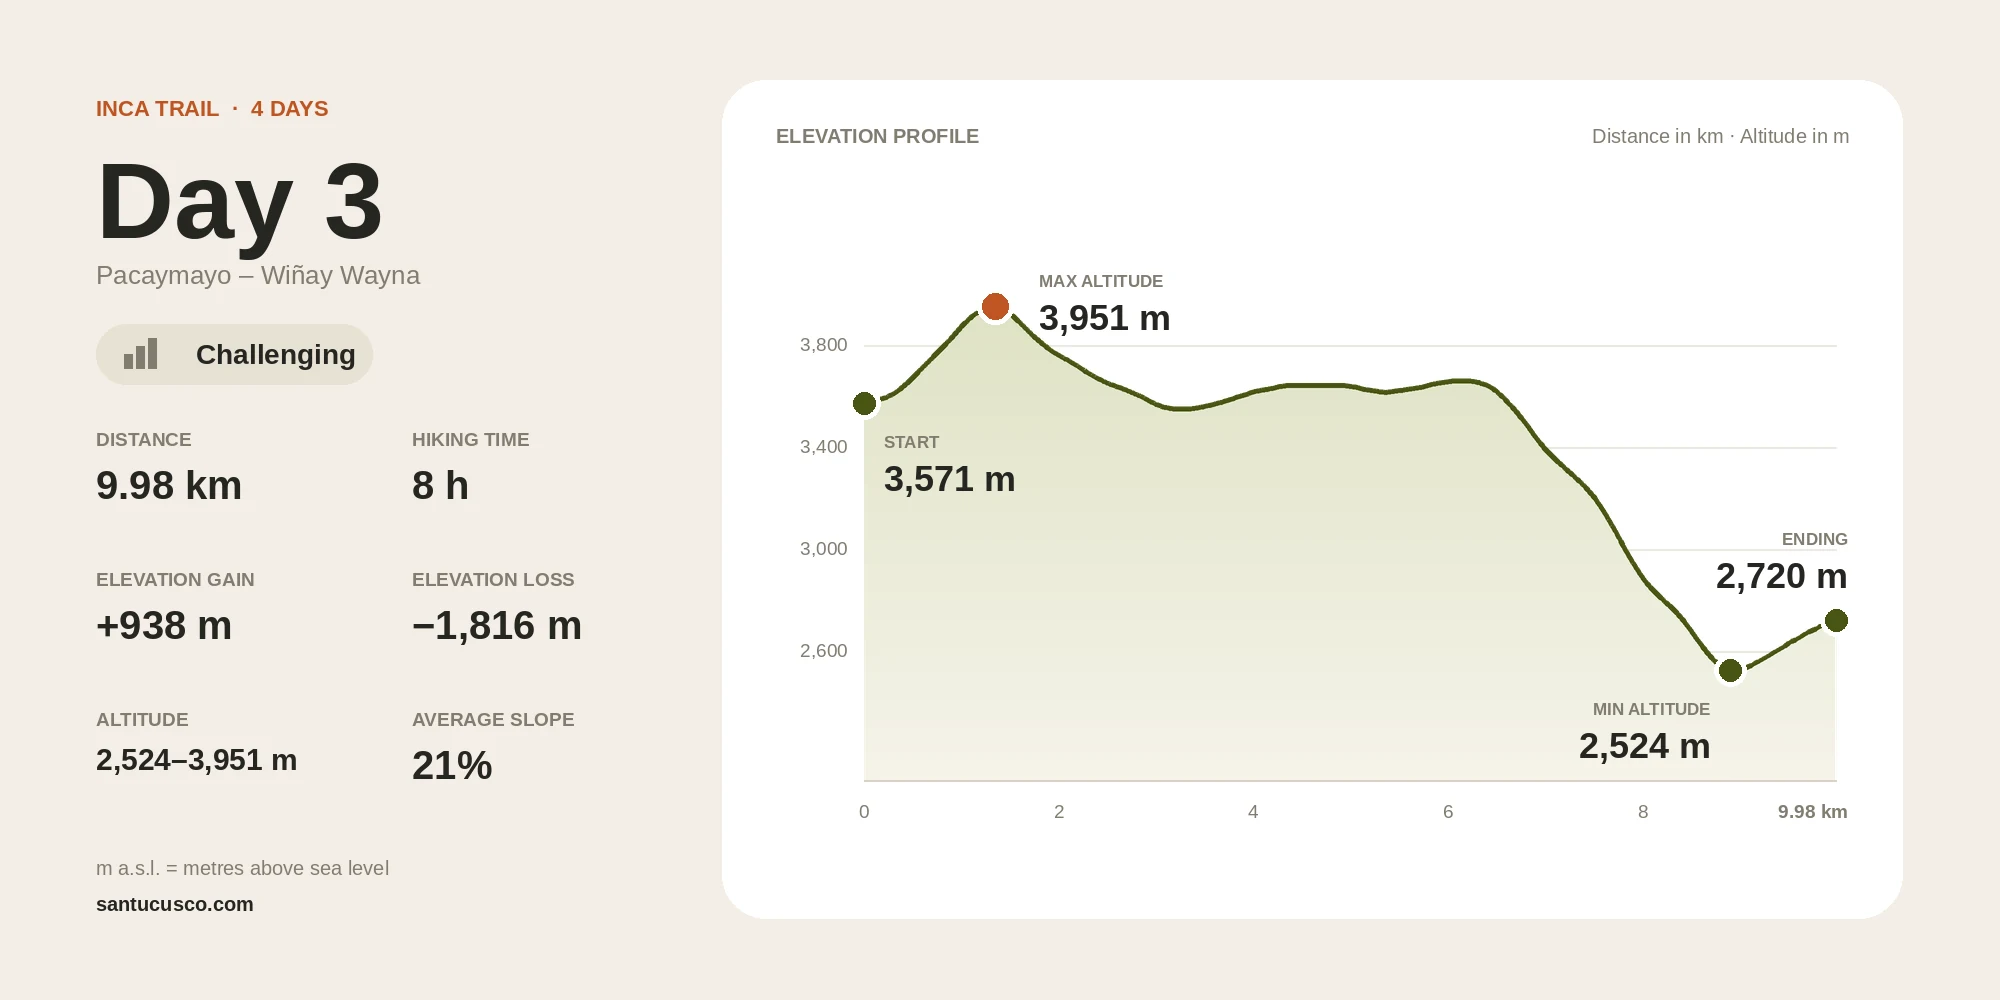
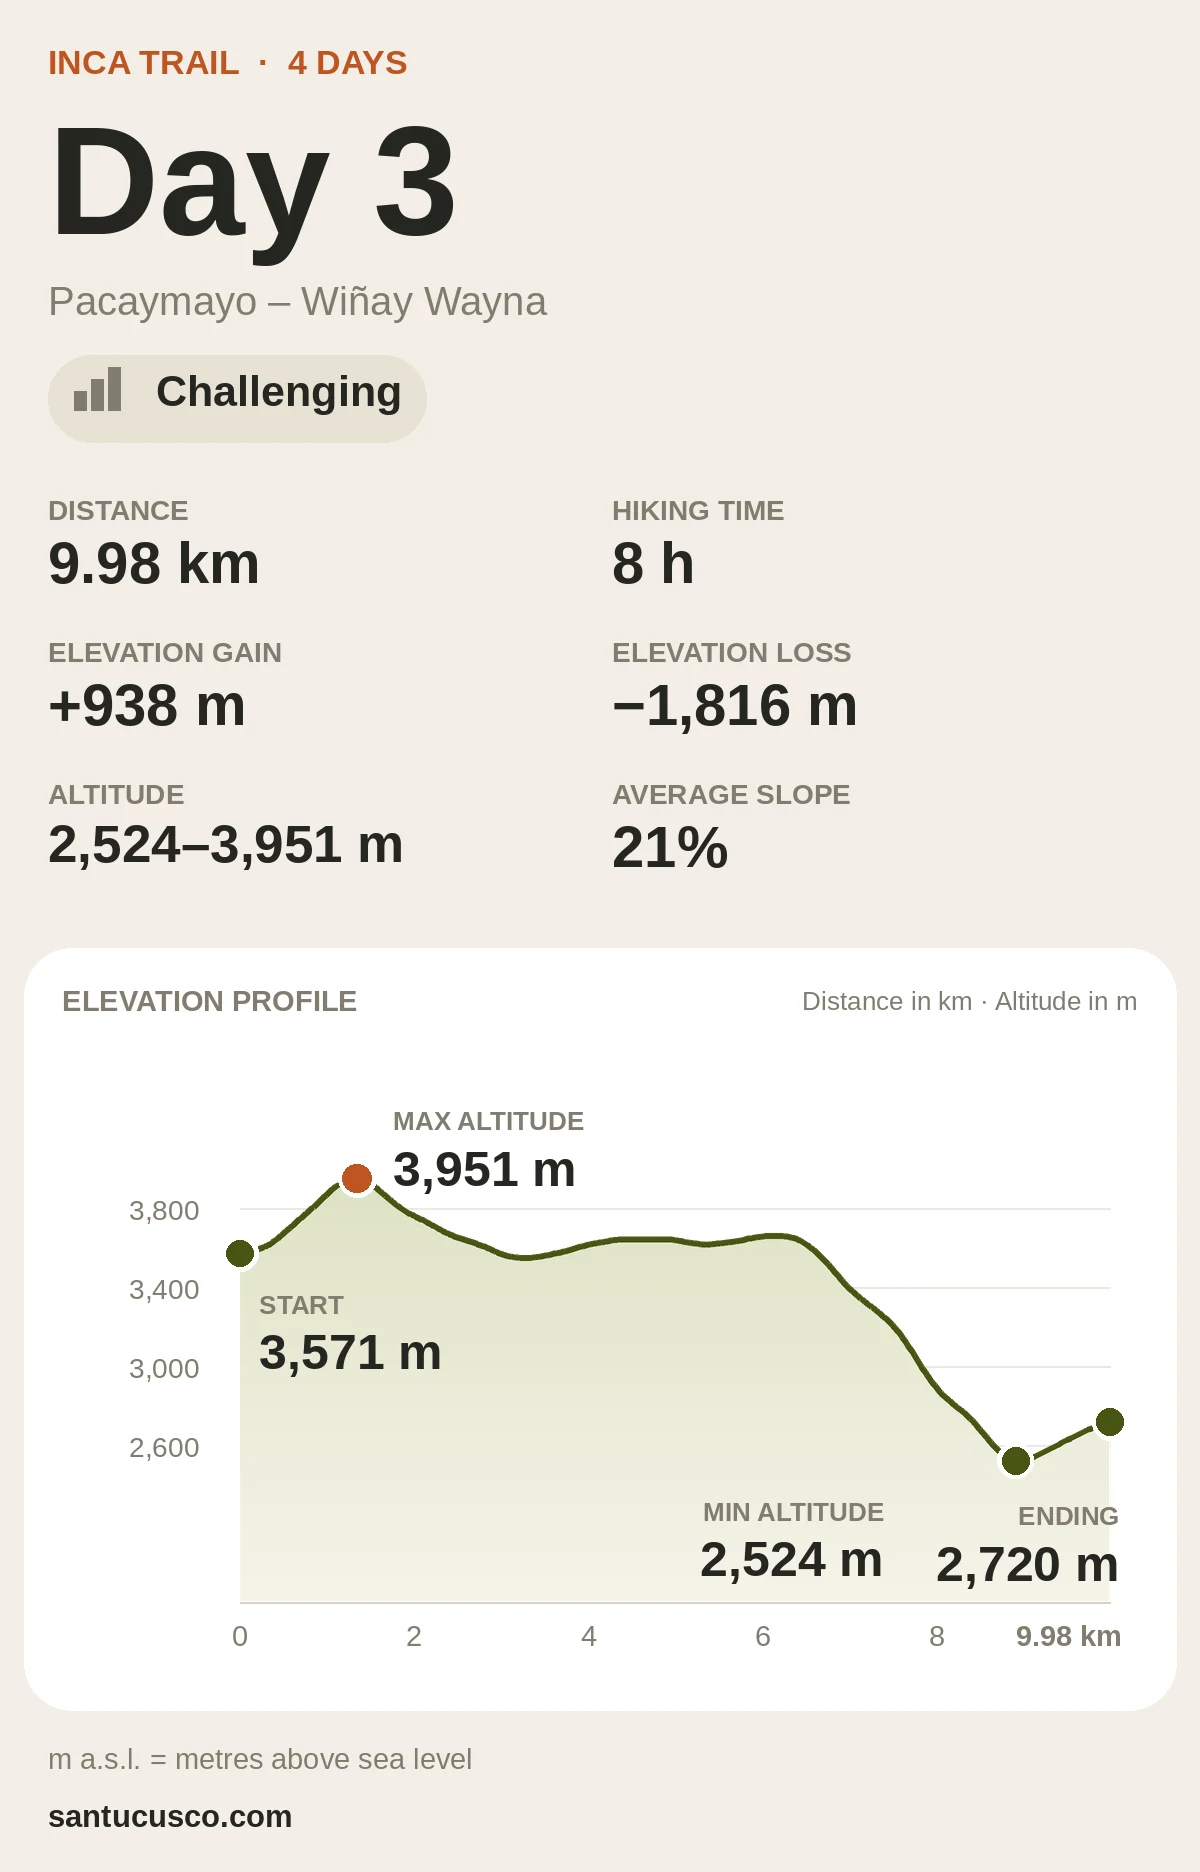
Day 3
9.98 km
8 h
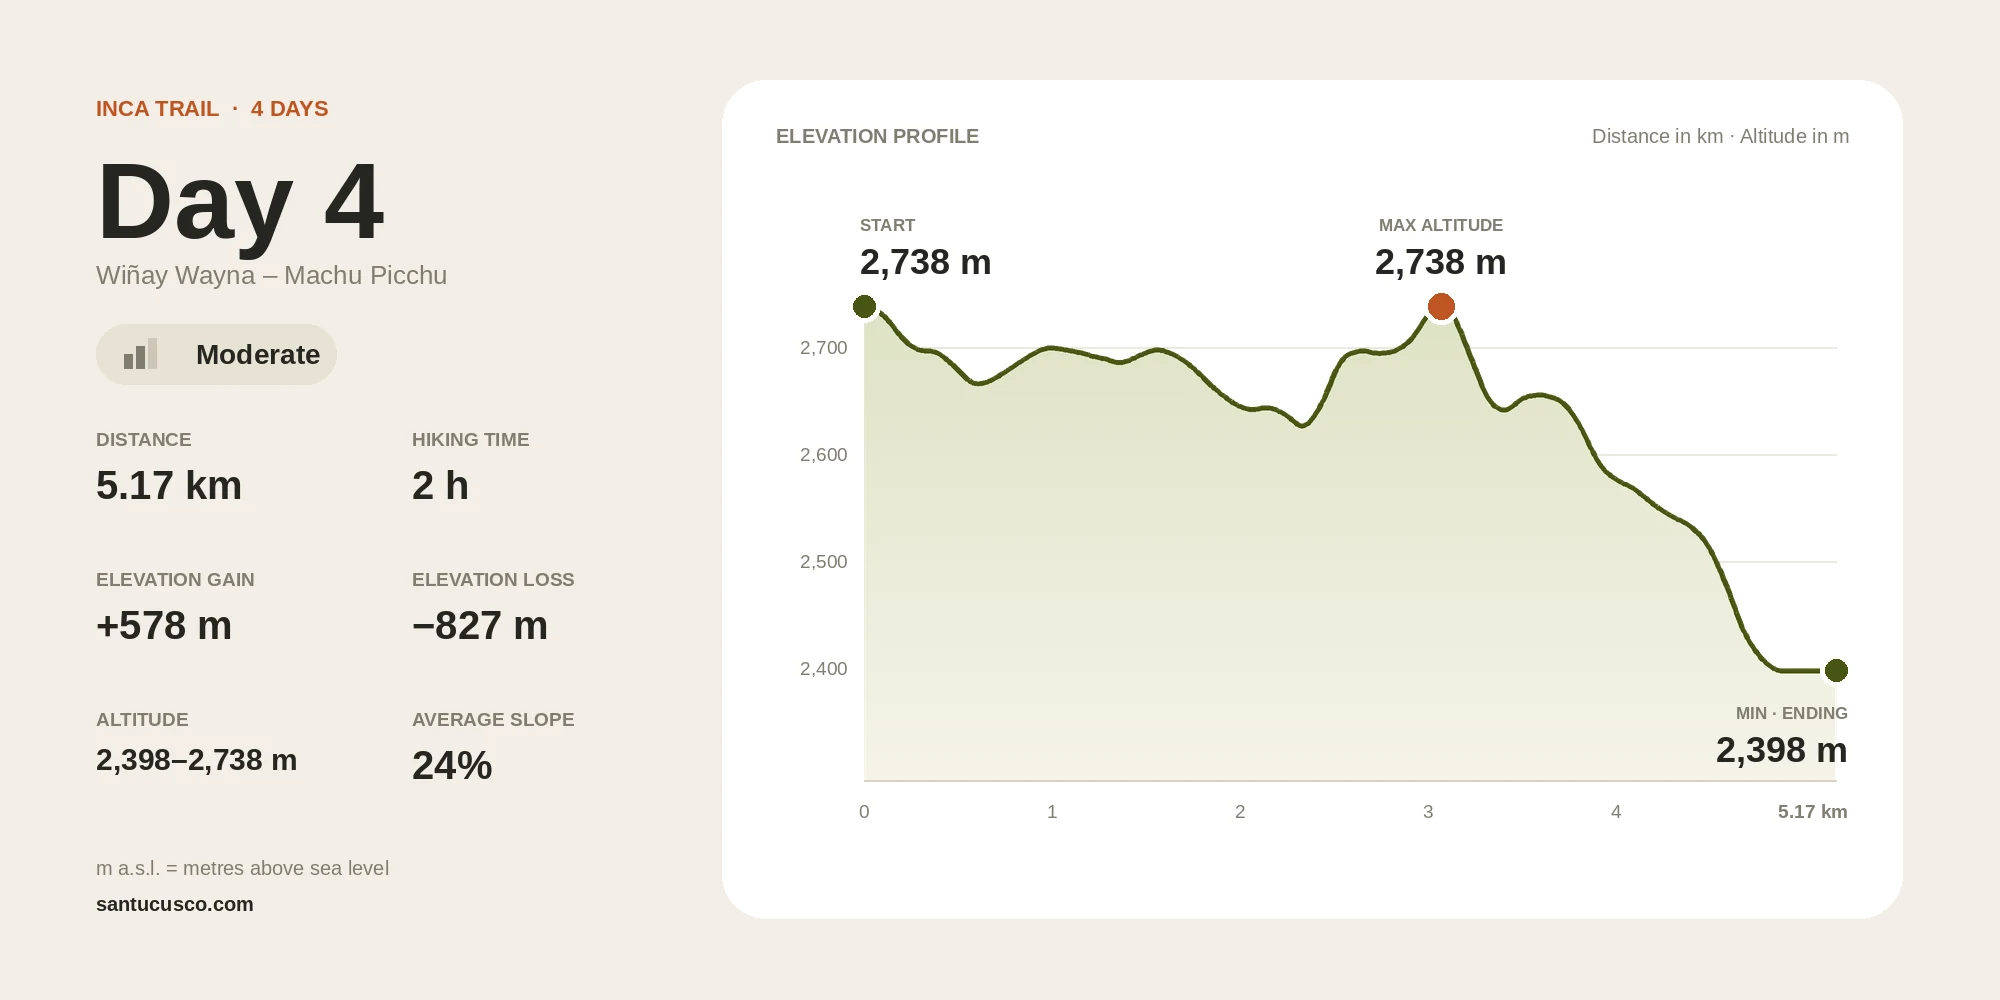
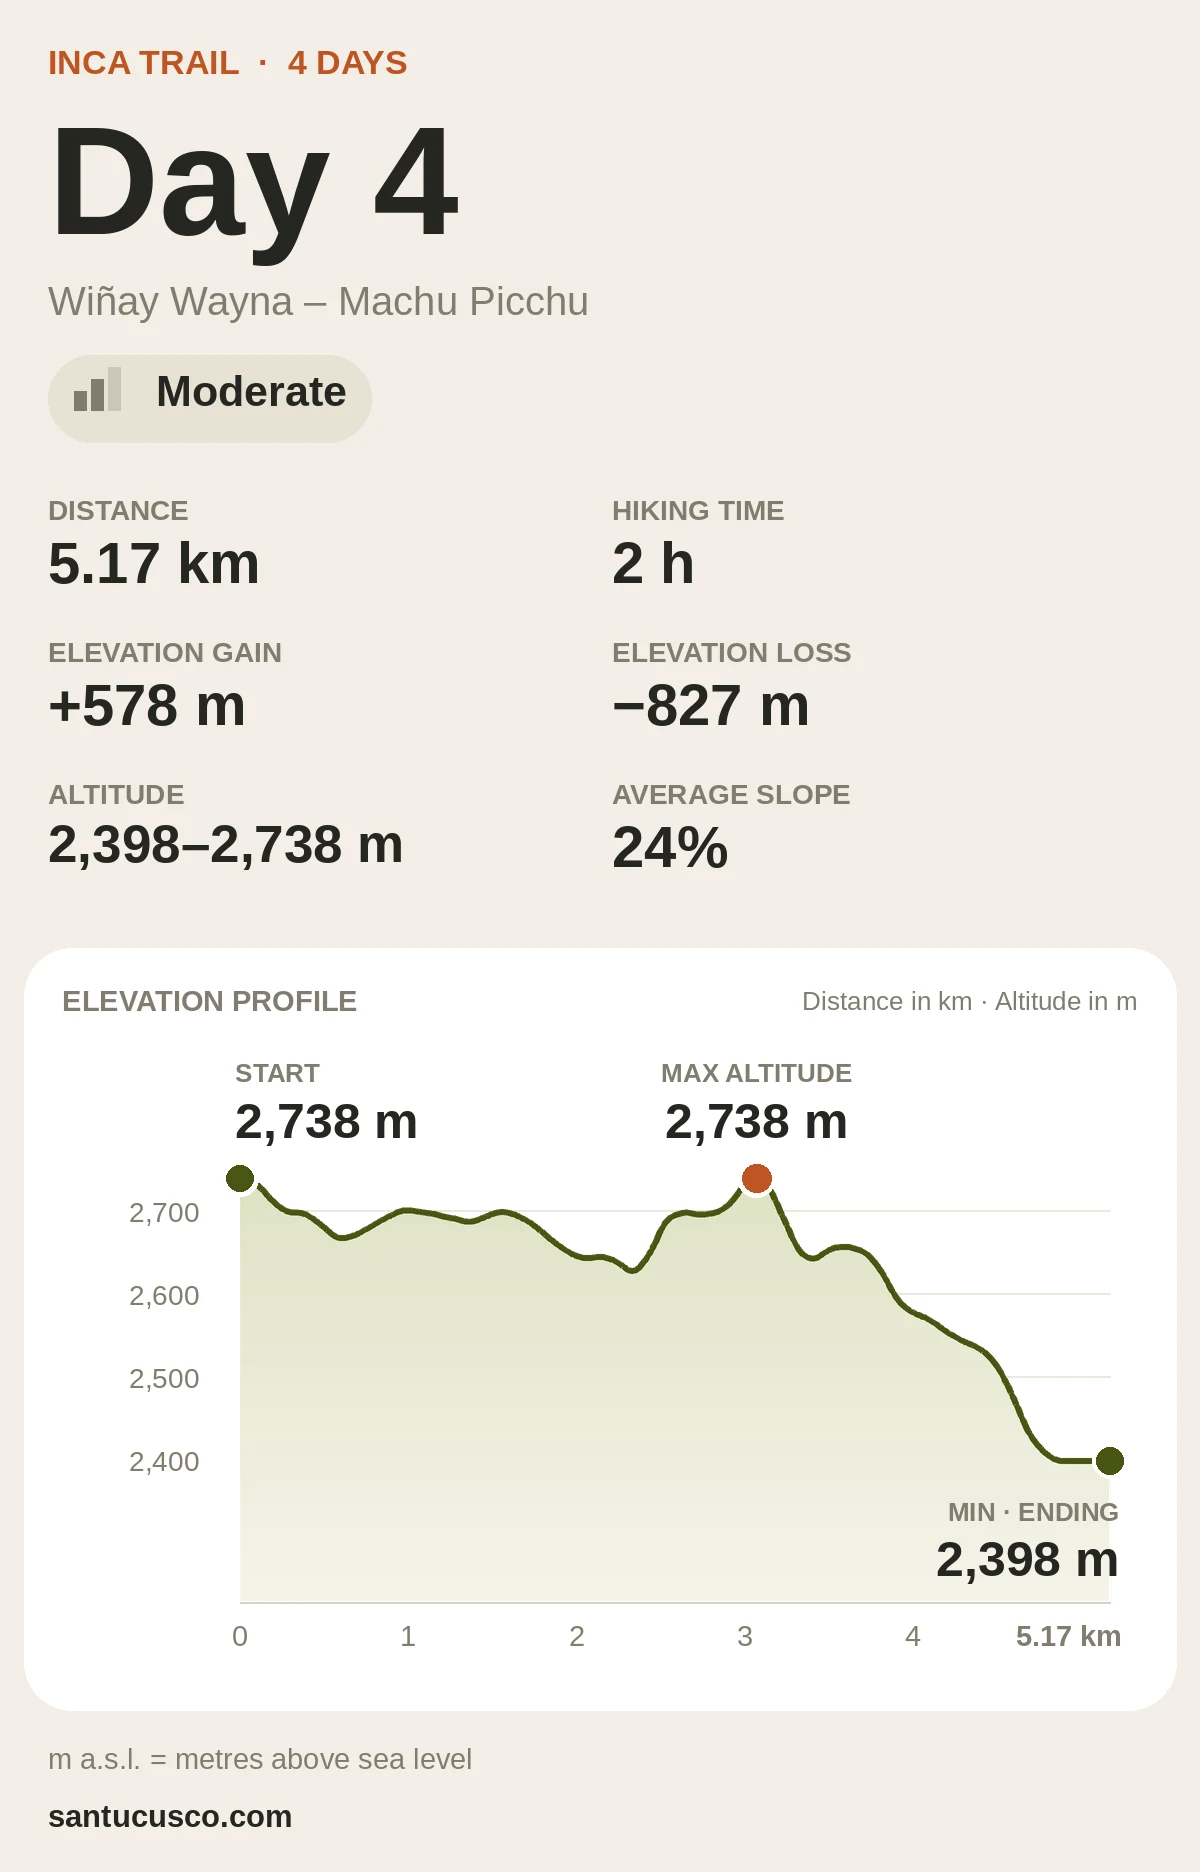
Day 4
5.17 km
2 h
Distance and time are walking data for each day’s trail section, not the length of the whole day. Times are approximate and vary with your pace and the weather.
Route Map
Inca Trail Route Map
Route 1 runs from Piskacucho (Km 82) to Machu Picchu via Wayllabamba, Dead Woman’s Pass (Warmiwañusca) and Inti Punku, the Sun Gate: about 33.4 km over 4 days and 3 nights, according to Santu’s own GPS trace. To explore further, tap each day on the map to see its route, campsites, archaeological sites and altitude.
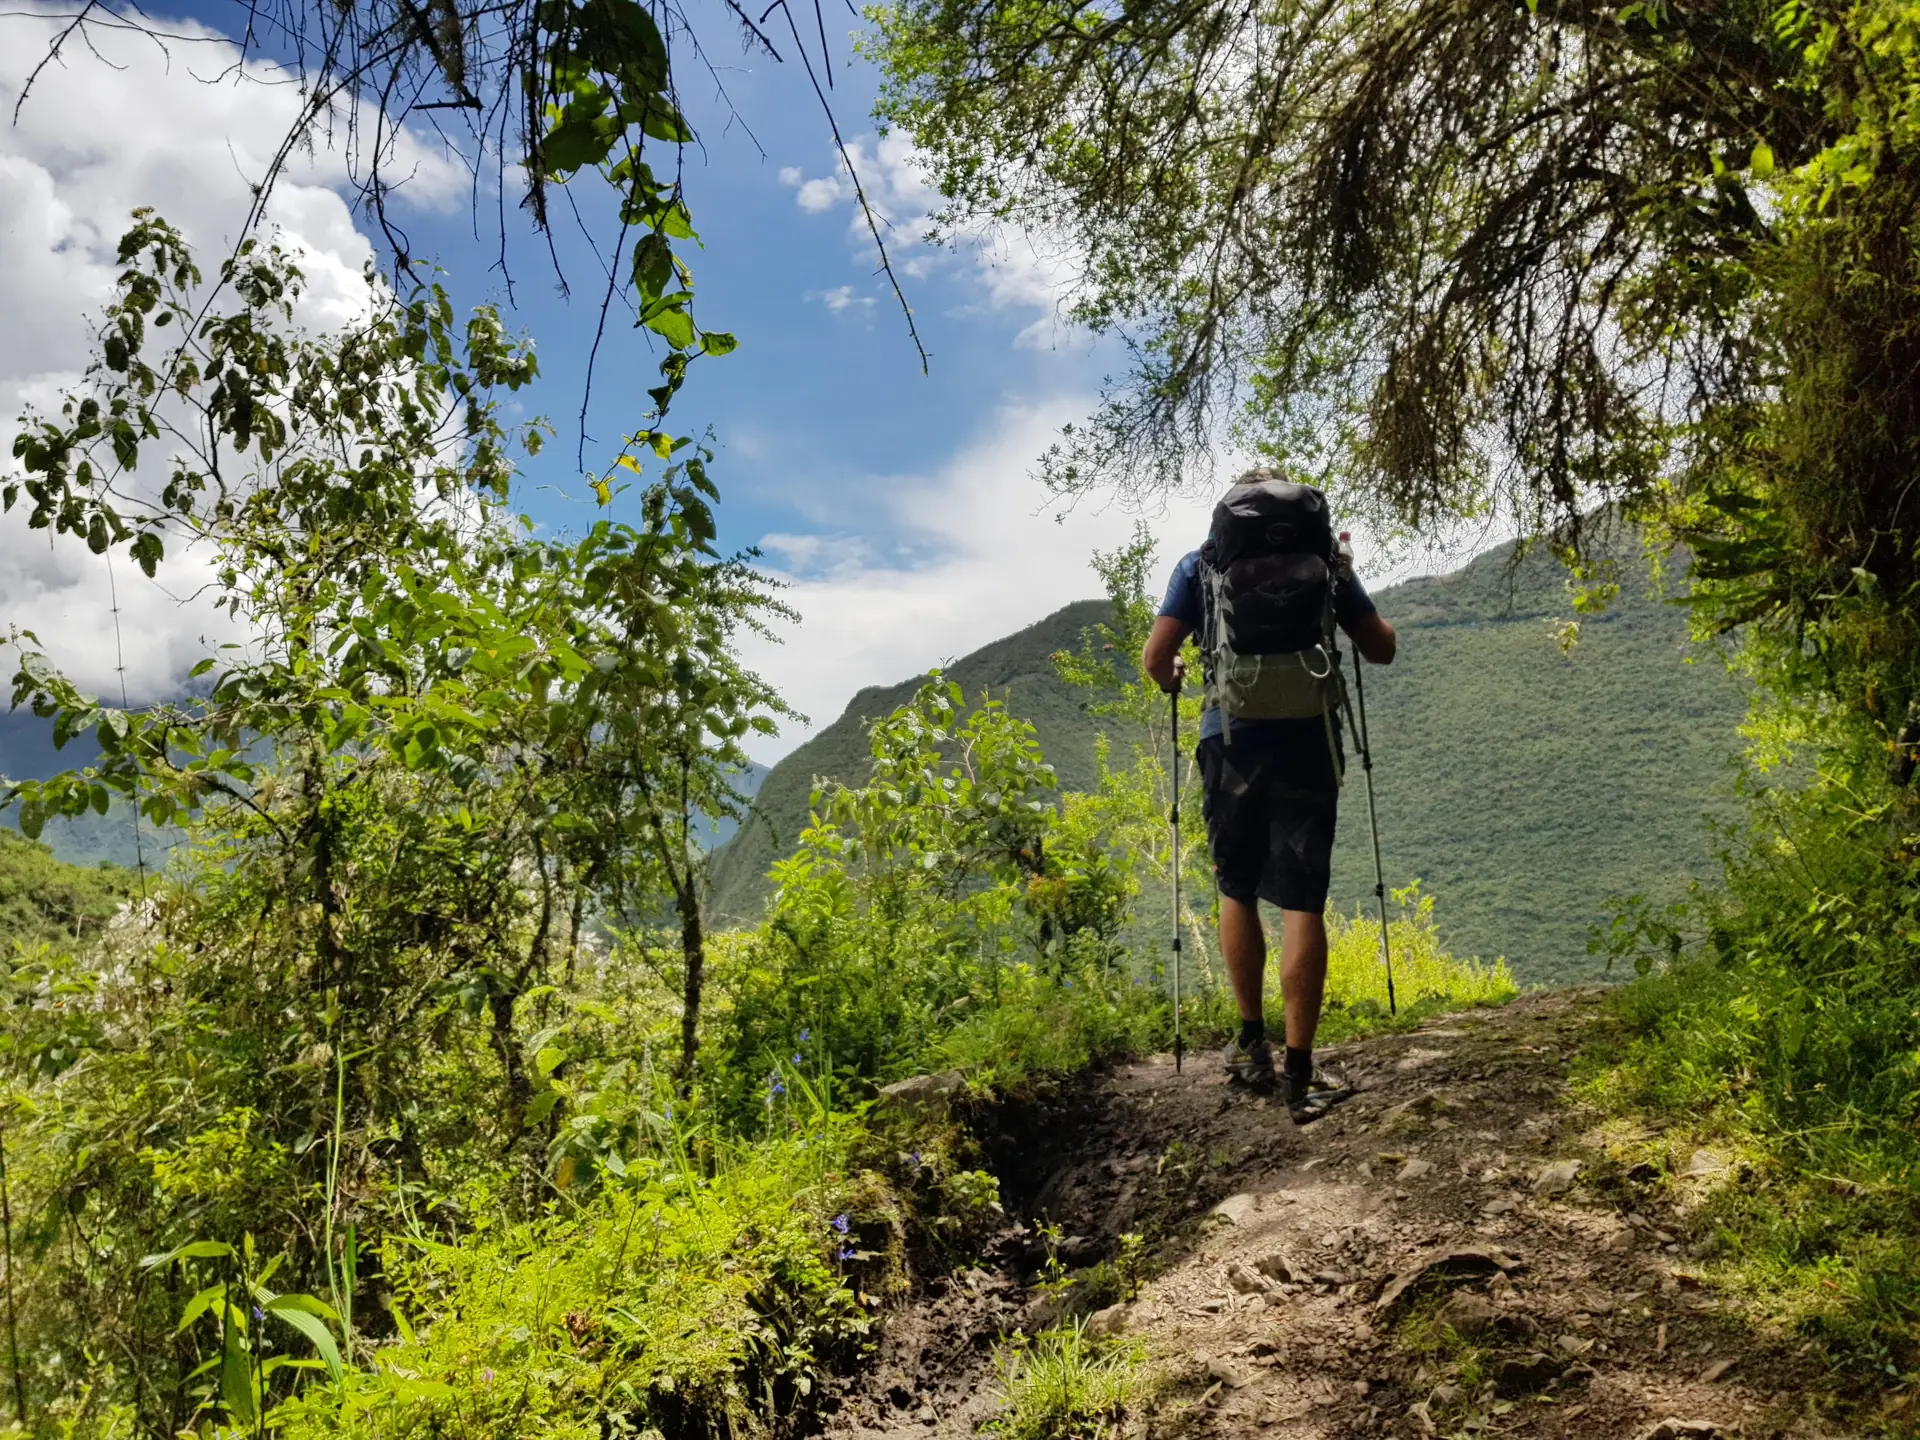
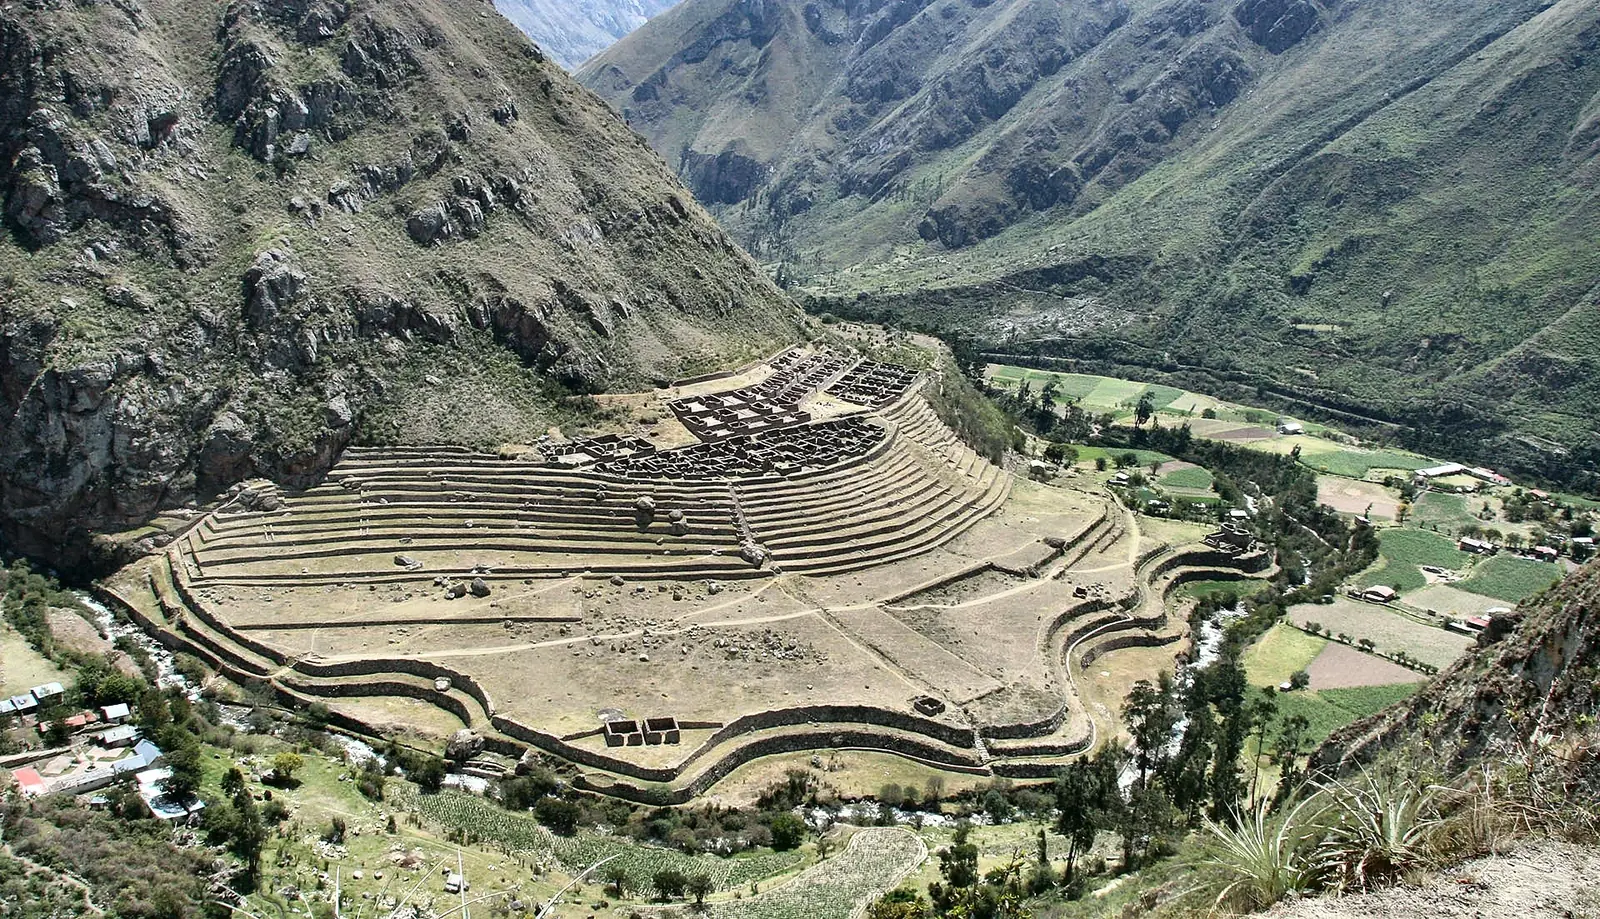
Your first steps on the original Inca Trail, from Km 82 to the camp at Wayllabamba.
Day at a Glance
Distance: 10.8 km
Hiking time: 5–6 h
Highest point: 2,941 m a.s.l. (9,649 ft)
Difficulty: Moderate
Meals: Lunch, Dinner
Elevation gain+788 m
Elevation loss−498 m
Highlights
Hike the original Inca Trail.
Explore Llactapata archaeological site.
Scenic views of the Sacred Valley.
Experience your first mountain campsite.
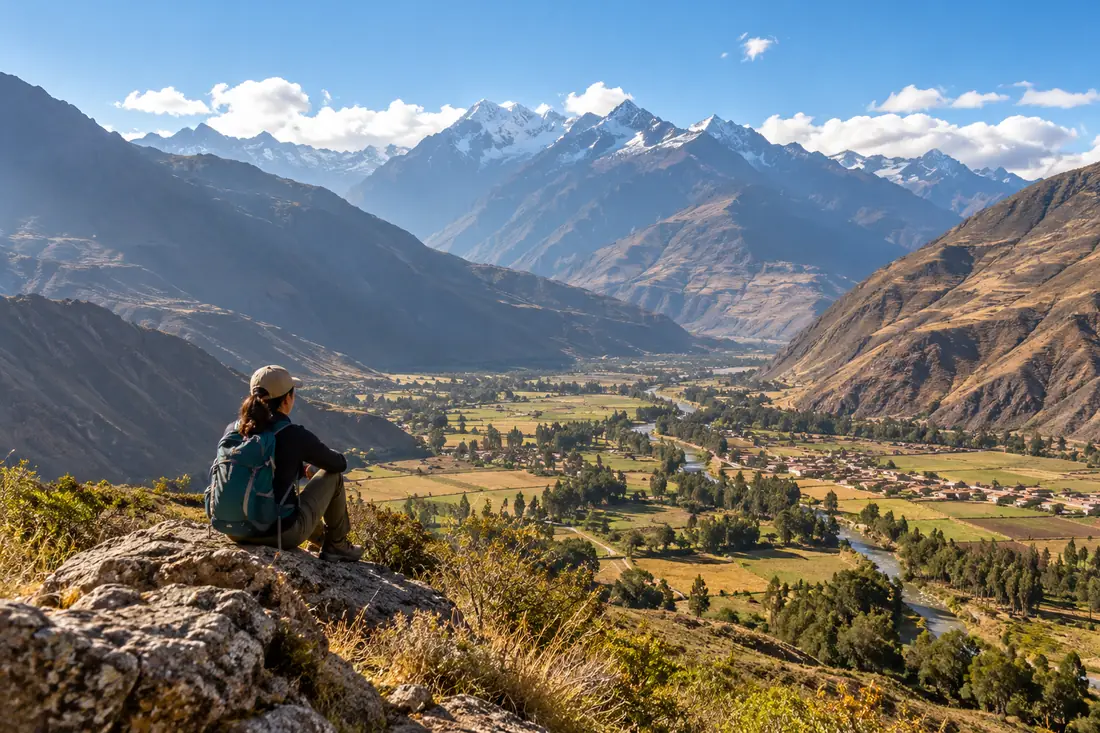
We leave Cusco early and travel through the Sacred Valley to Km 82, the official start of the Classic Inca Trail. Snow-capped mountains, Andean villages and old farming terraces line the way.
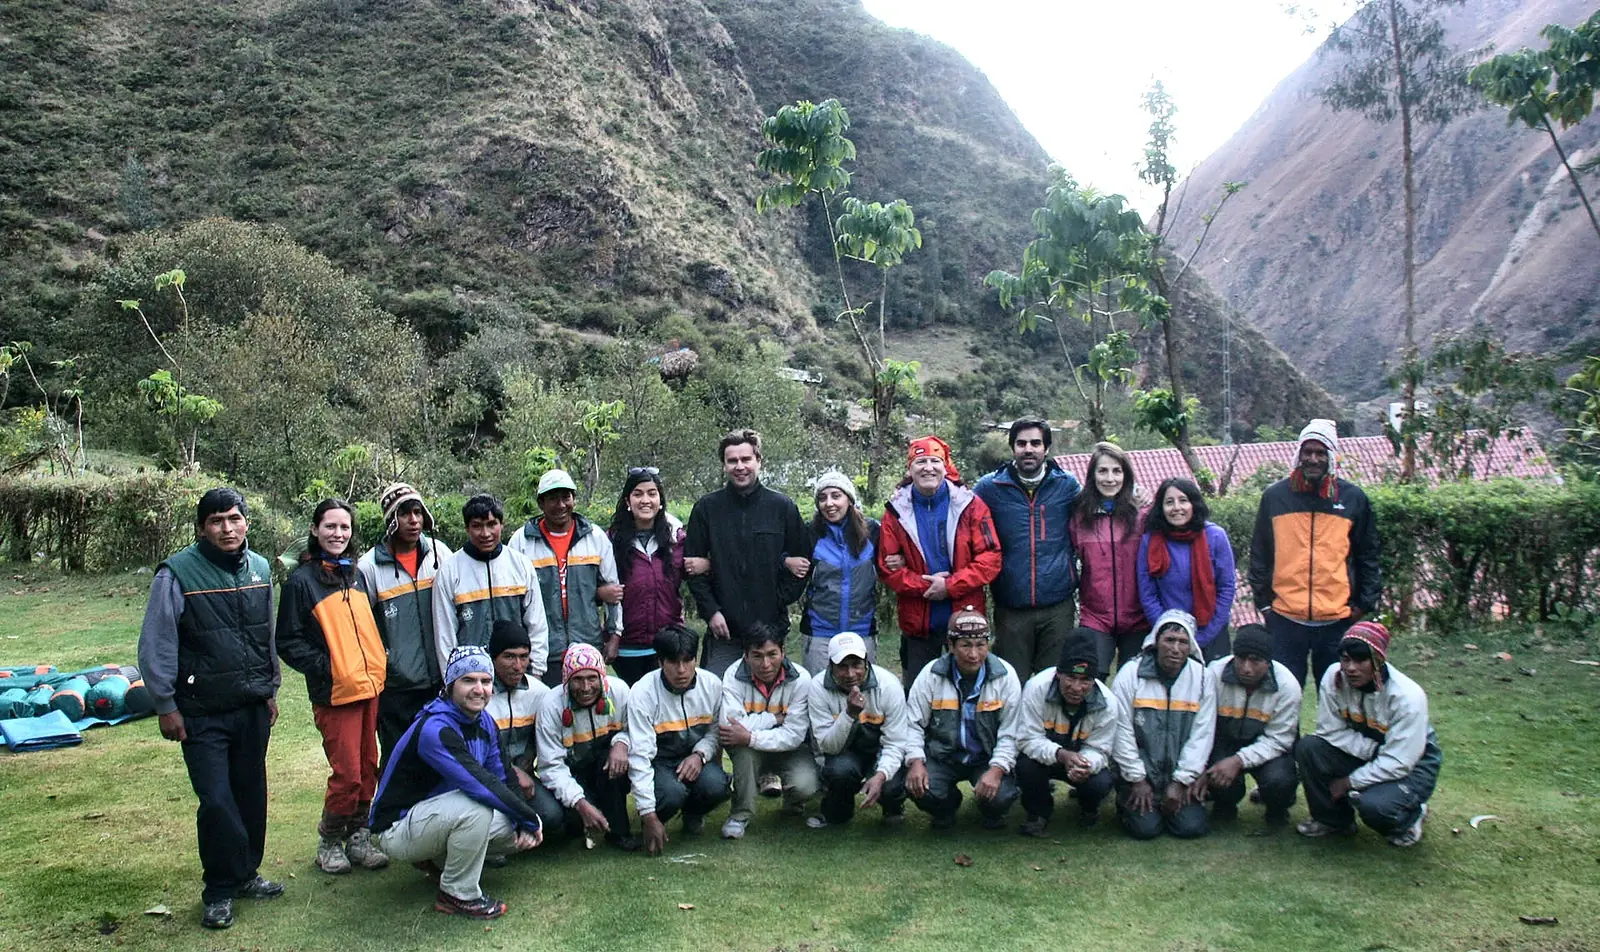
At the trailhead you meet your trekking team, including the experienced porters and cooks who walk with you. The path follows the Urubamba River on original Inca stone and passes small archaeological sites such as Llactapata, where your guide tells the story of the Inca.
As the sun sets behind the Andes, we reach the Wayllabamba camp. A freshly prepared dinner is waiting, and the evening is quiet, a good moment to rest before tomorrow’s climb.
On the Trail
Terrain
Dirt and stone path along the valley, with ups and downs.
Ascent / descent
Moderate, sustained climbs; no big descents.
Weather
Warmer than the following days; it cools in the late afternoon.
What to eat
Lunch on the trail and dinner at camp. Bring snacks for the walk.
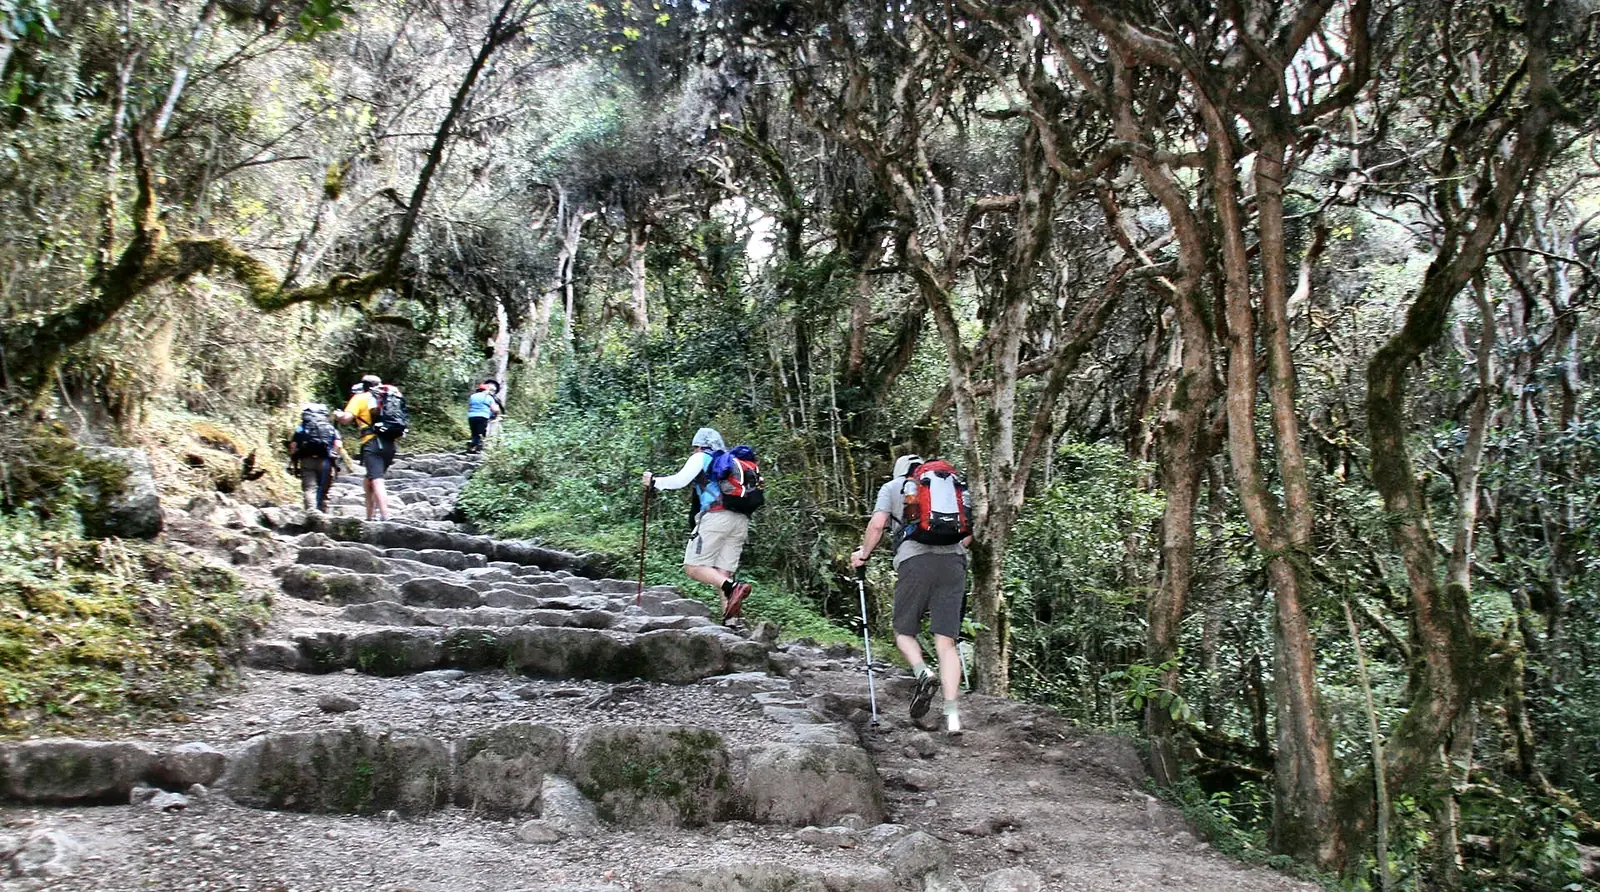
Day 2 is the highest and most demanding day of the trek. After an early breakfast, we climb through cloud forest toward Warmiwañusca, better known as Dead Woman’s Pass.
The trail steepens as you gain height, and the views open up with every step. The reward is the highest point of the Inca Trail, at 4,207 m a.s.l. (13,802 ft).
Take a moment at the top to catch your breath and take your photo; the wind and cold don’t leave much time to linger. You have just finished the biggest climb of the trek.
After resting at the summit, we descend into the Pacaymayo valley, where camp is set up for dinner and the night.
On the Trail
Terrain
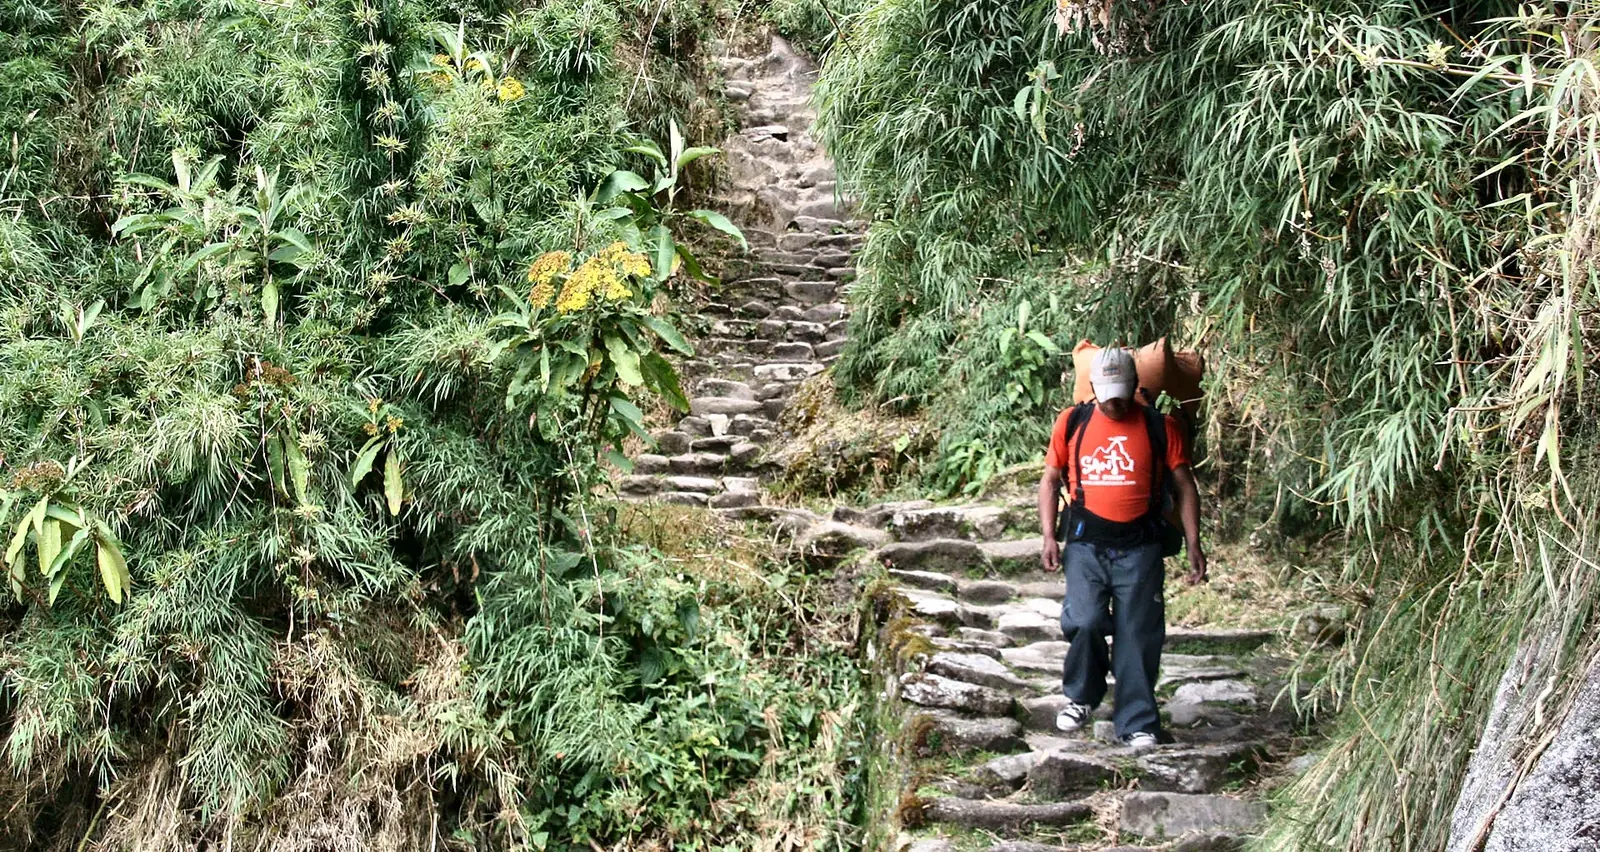
Stone steps and steep path through cloud forest and high puna.
Ascent / descent
Long climb to the pass, then a long stepped descent that is hard on the knees.
Weather
Changeable; colder and windier near the pass.
What to eat
Breakfast, lunch and dinner are included. Keep a snack within reach.
Where you rest
Camp at Pacaymayo.
It often surprises people
The descent costs almost as much as the climb.
Day 2 Survival Tips
What will you feel? Faster breathing, heavy legs and the urge to stop. That is normal: slow your pace, not your spirit.
Manage your energy Short steps, brief and frequent breaks, and no rushing on stretches that “feel good”.
Keep at hand Water, a snack, a poncho, a jacket, a hat and sunscreen.
Cloud forests, original Inca stairways and hidden archaeological sites: often the most beautiful day of the trek.
Day at a Glance
Distance: 9.98 km
Hiking time: 8 h
Highest point: 3,951 m a.s.l. (12,963 ft)
Difficulty: Challenging
Meals: Breakfast, Lunch, Dinner
Elevation gain+938 m
Elevation loss−1,816 m
Highlights
Visit Phuyupatamarca ruins.
Walk through cloud forests.
Explore Wiñay Wayna archaeological site.
Scenic original Inca staircases.
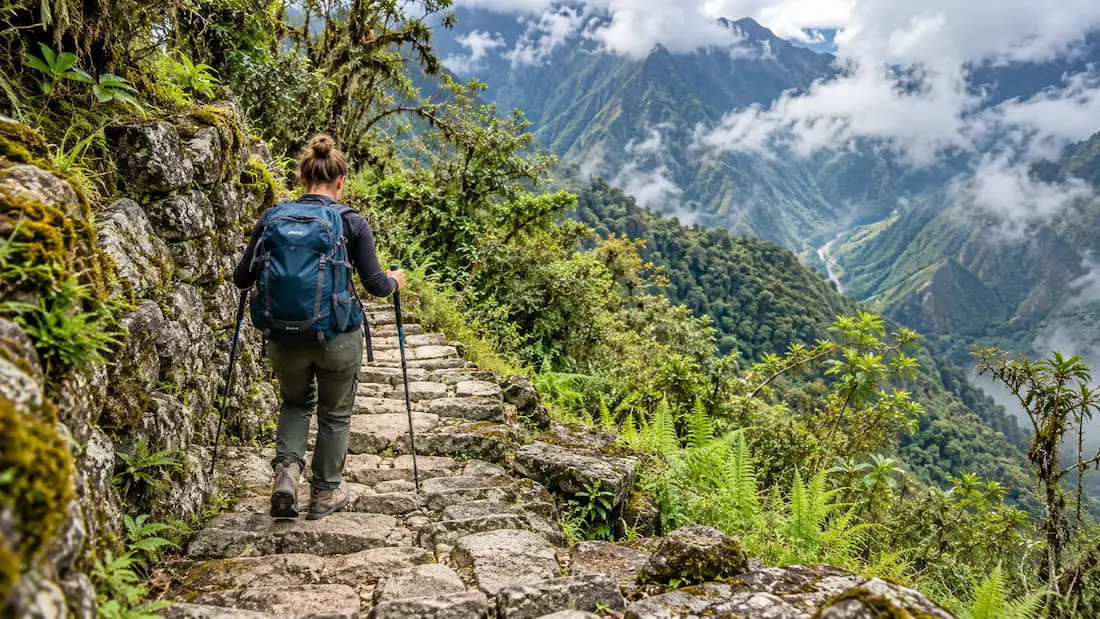
Day 3 is often called the most beautiful day of the trek. The route passes through cloud forest, original Inca stairways and archaeological sites tucked into the Andes.
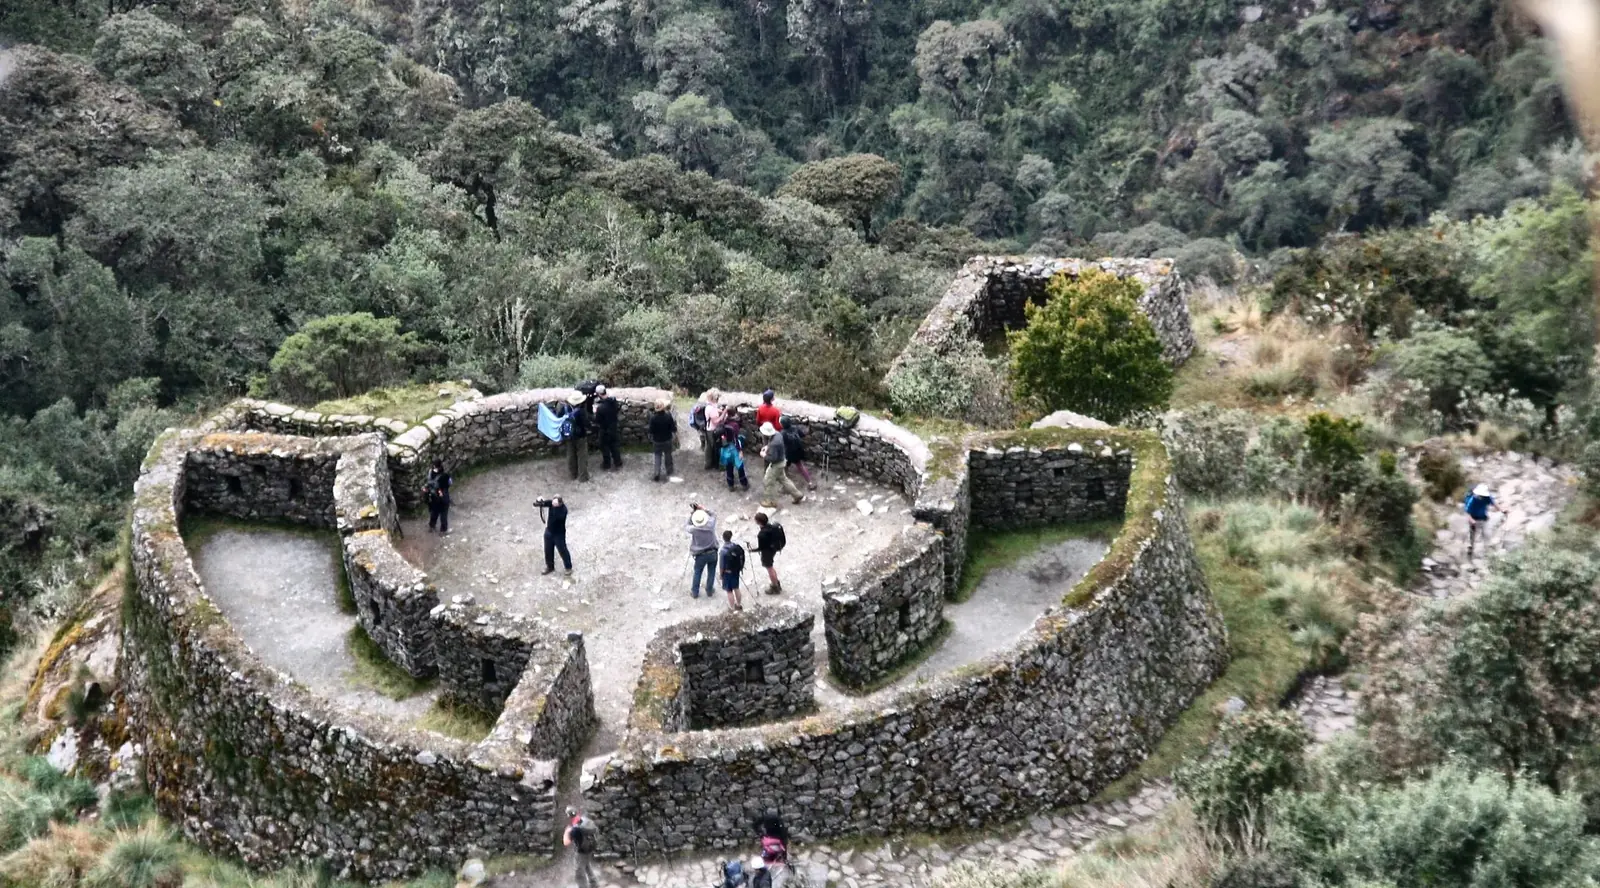
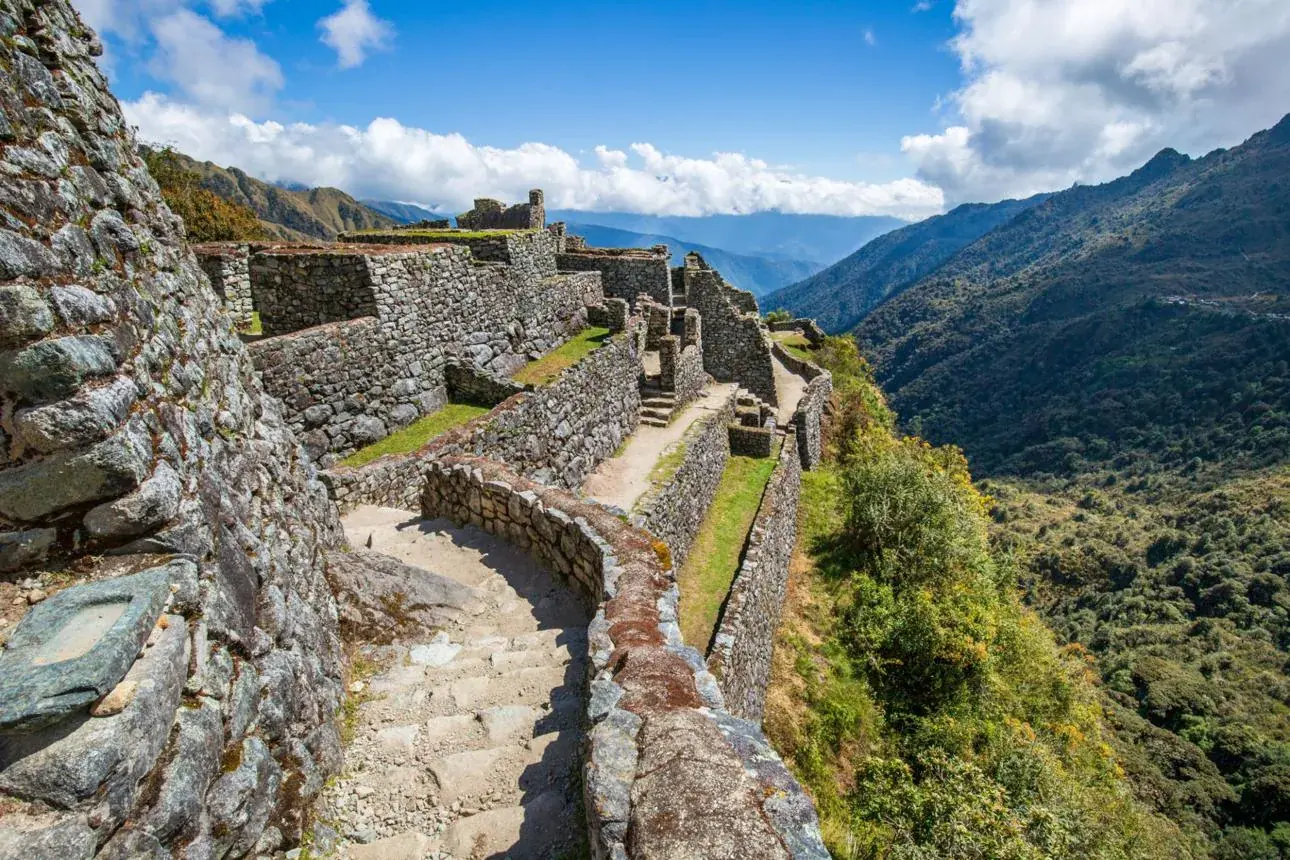
After the Runkurakay Pass, the trail descends through dense vegetation and old stone paths to Phuyupatamarca, known as “The Town Above the Clouds.” From here you look out over valleys covered in mist.
The trail continues through cloud forest to the archaeological site of Wiñay Wayna, with its agricultural terraces on the hillside.
Tonight’s camp is near Wiñay Wayna, so you can rest before the last stretch to Machu Picchu.
On the Trail
Terrain
Stone staircases, damp stretches and paths through vegetation.
Ascent / descent
A second pass and many stepped descents.
Weather
Frequent mist and humidity; keep your poncho at hand.
What to eat
Lunch on the trail. Eat something even if you are not hungry.
Sunrise at the Sun Gate, then a guided visit to Machu Picchu.
Day at a Glance
Distance: 5.17 km
Hiking time: 2 h
Highest point: 2,738 m a.s.l. (8,983 ft)
Difficulty: Moderate
Meals: Breakfast
Elevation gain+578 m
Elevation loss−827 m
Highlights
Arrive at Machu Picchu through the Sun Gate.
Sunrise views over the Lost City of the Incas.
Guided tour of Machu Picchu.
Scenic train journey back to Cusco.
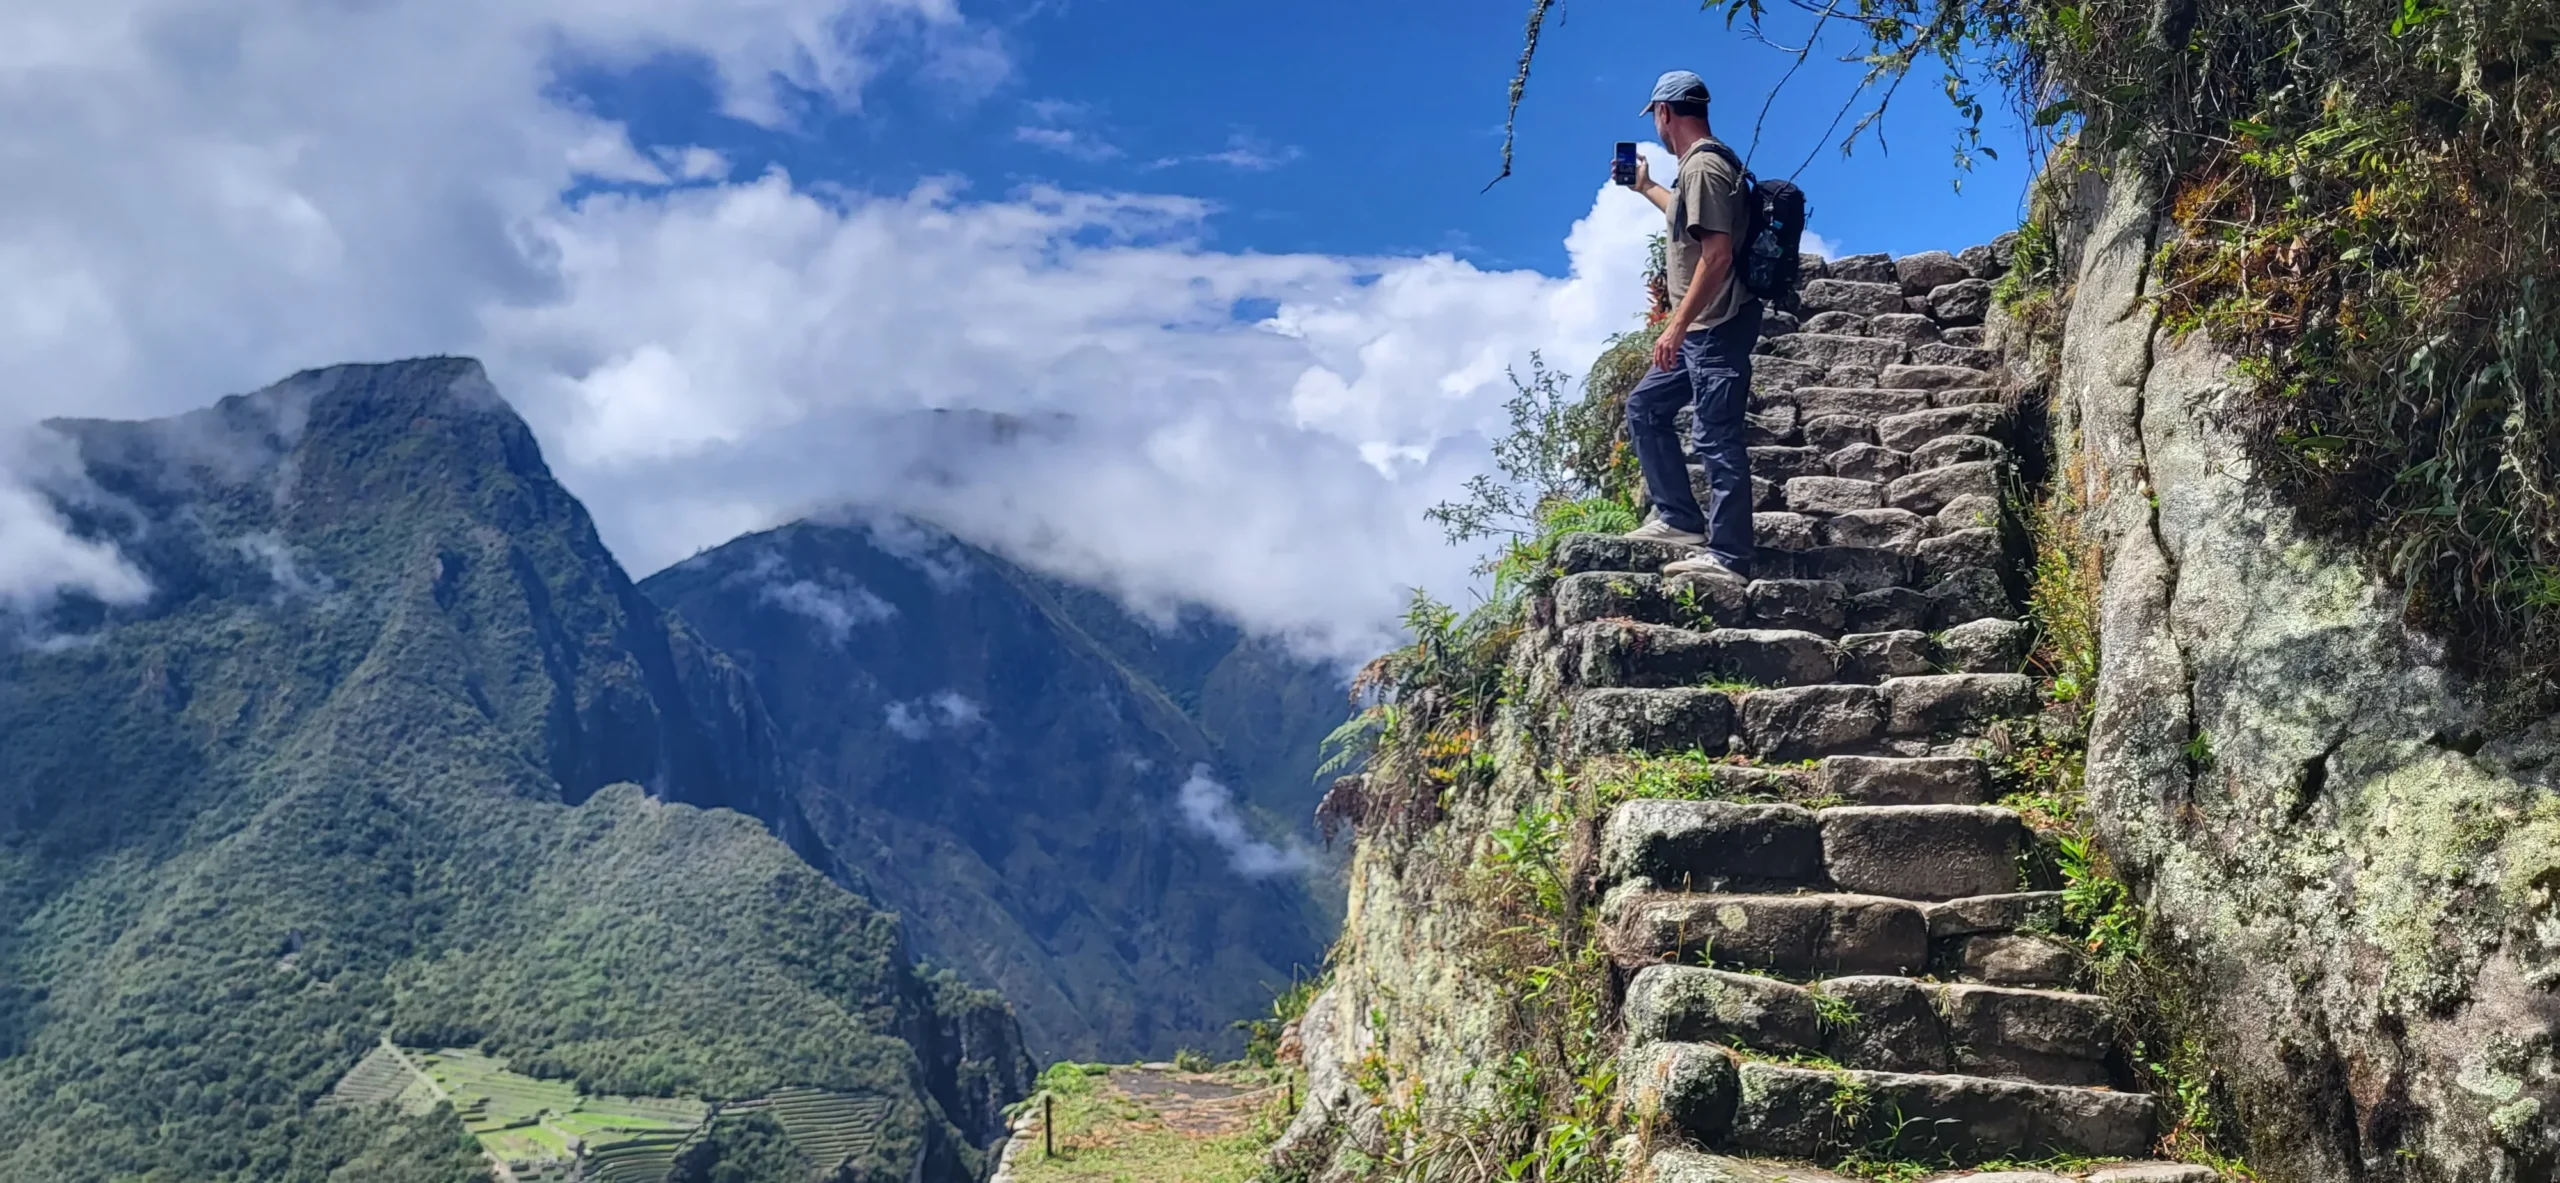
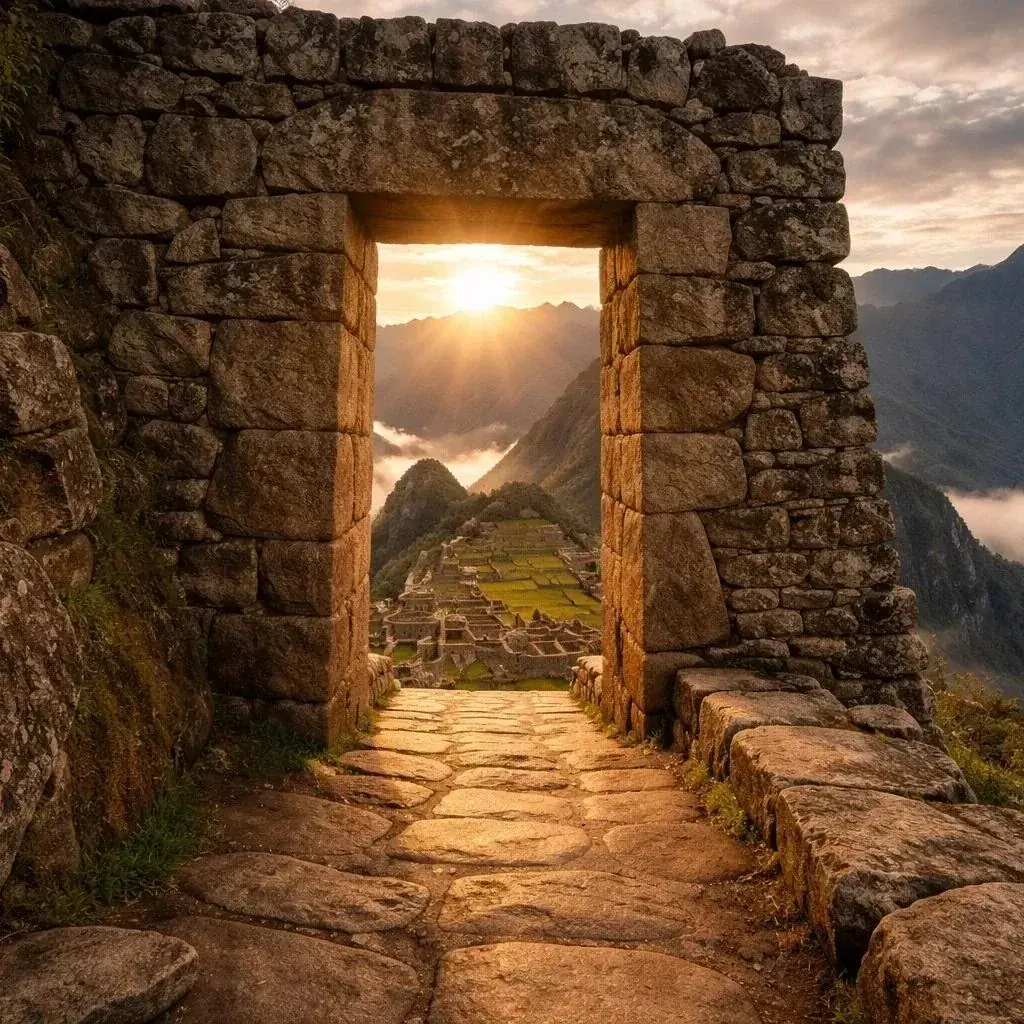
The last day starts before sunrise, as we walk toward Inti Punku, the Sun Gate. When the first light reaches Machu Picchu, you see the citadel for the first time.
From the Sun Gate you look down on Machu Picchu among the mountains and mist. Arriving on foot along the original Inca Trail is what sets this route apart.
After the descent into Machu Picchu, your guide leads a full tour of the citadel: its temples, terraces and ceremonial areas, and the history behind them.
After the guided visit, we return by train to Ollantaytambo and then by private or shared transport to Cusco.
On the Trail
Terrain
Stone path, then the final steps up to Inti Punku.
Ascent / descent
A climb to Inti Punku, then a descent to the citadel.
Weather
Cool morning and, with luck, clear skies.
What to eat
Breakfast only is included on this day. Lunch in Aguas Calientes is not included.
Where you rest
Return to Cusco the same day.
It often surprises people
The mix of tiredness and emotion when you see the citadel from above.
Elevation Profile
Training
How to Prepare for the Inca Trail
You do not need to be an athlete to hike the Inca Trail, but being reasonably fit will help you enjoy it more.
The key is consistency, not extreme workouts. Prepare gradually, at your own pace, and avoid pushing yourself too hard just before you travel.
Build your stamina
Walk regularly, cycle or use an inclined treadmill. Short, frequent sessions you enjoy work better than a few exhausting ones.
Strengthen your legs
In addition, gym work for your thighs, glutes and calves helps, along with a little balance practice. Choose exercises that suit you, or ask a trainer.
Practice uphill and downhill walking
If you can, enjoy a few hikes with hills and long descents, wearing the shoes you plan to use and carrying your daypack.
Allow time to acclimatize
To adjust, plan at least one full day in Cusco (3,399 m a.s.l.) or the Sacred Valley before your trek. Rest, drink water and take it easy. A gentle half-day walk in the Sacred Valley, such as the Perolniyoq waterfall, also helps you adjust and test your boots.
Good to know: being fit helps you enjoy the trek, but it does not protect you from altitude sickness. Anyone can feel it, whatever their fitness. If you have a health condition, talk to your doctor before you travel.
The Small Backpack
What to Carry in Your Daypack
The bag you carry yourself while walking.
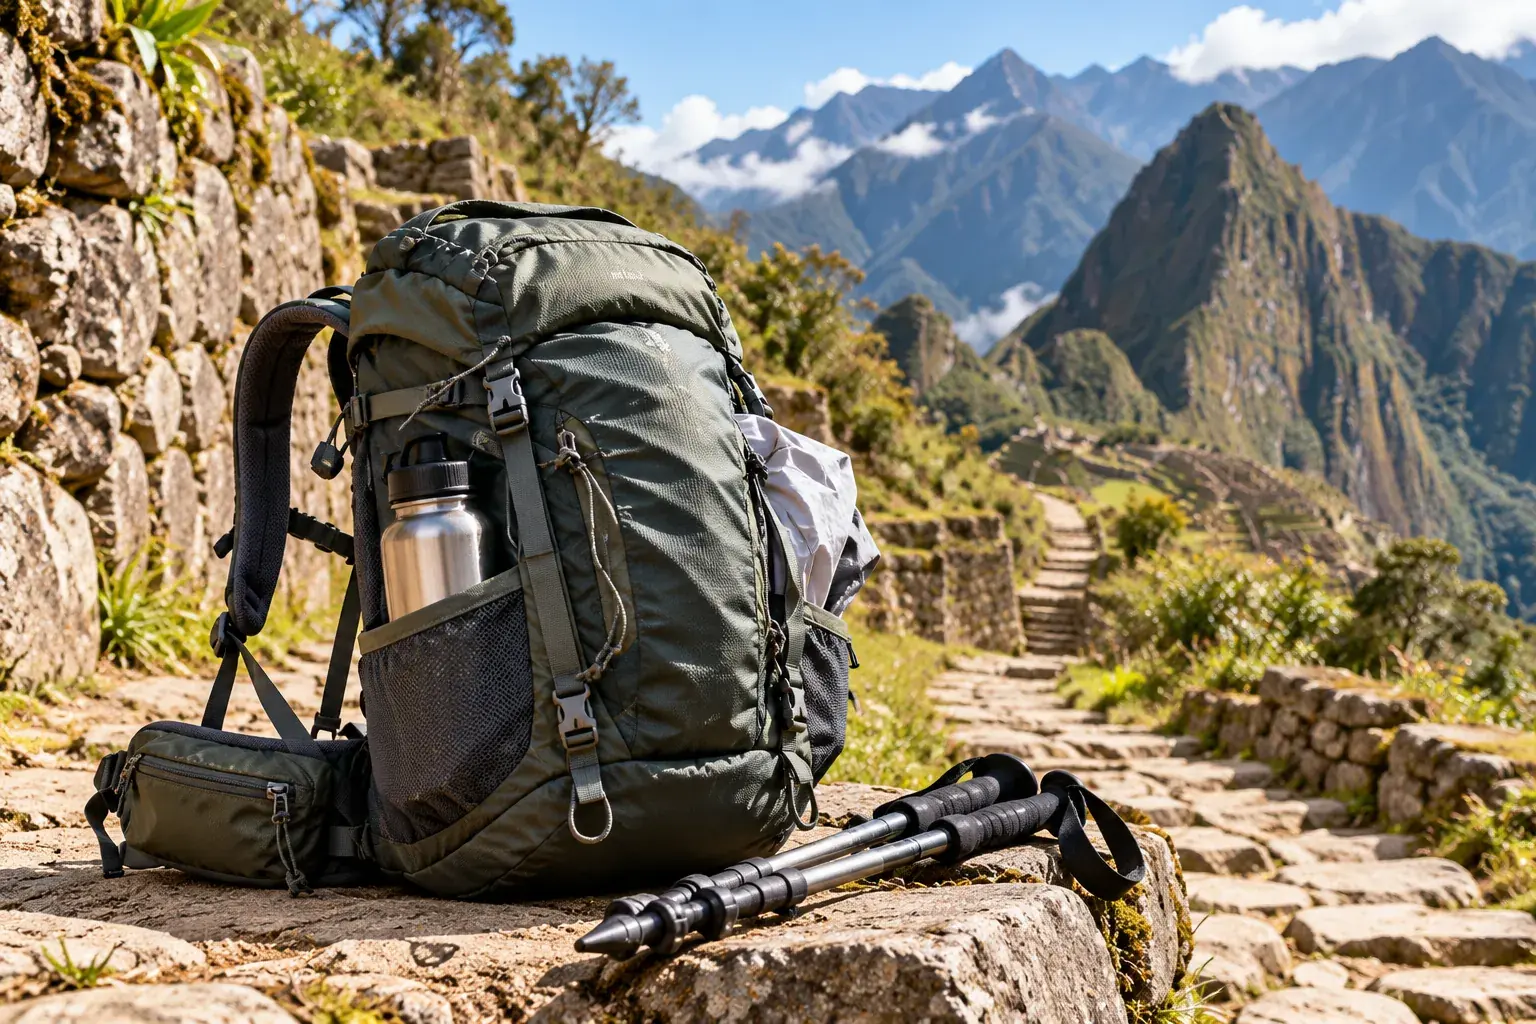
Keep within reach only what you need during the day. Camping equipment, however, is normally carried by the trekking crew, depending on the service you book. Tick off what you already have.
Daypack checklist
0 of 12
Your daypack is ready.
How to Choose and Pack Your Daypack
1
Top lidQuick pocket for small items.
2
Chest strapSpreads the weight and stops the pack from bouncing.
3
External pocketsSnack, sunscreen and poncho without opening the whole bag.
4
Capacity25–35 L is enough for a day of walking.
5
Side compression strapsCompress the load so it does not shift.
6
Hip beltAbout 70% of the load should rest here, not on your shoulders.
How to pack it
Adjust the hip belt first.
Keep heavy items close to your back.
Put things you use often in external pockets.
Use an inner waterproof liner.
Test the pack fully loaded before your trip.
What you do not need to carry
Spare “just in case” clothes
Several pairs of shoes
Books, laptop or heavy photography gear
Extra bottles and full-size toiletries
Footwear
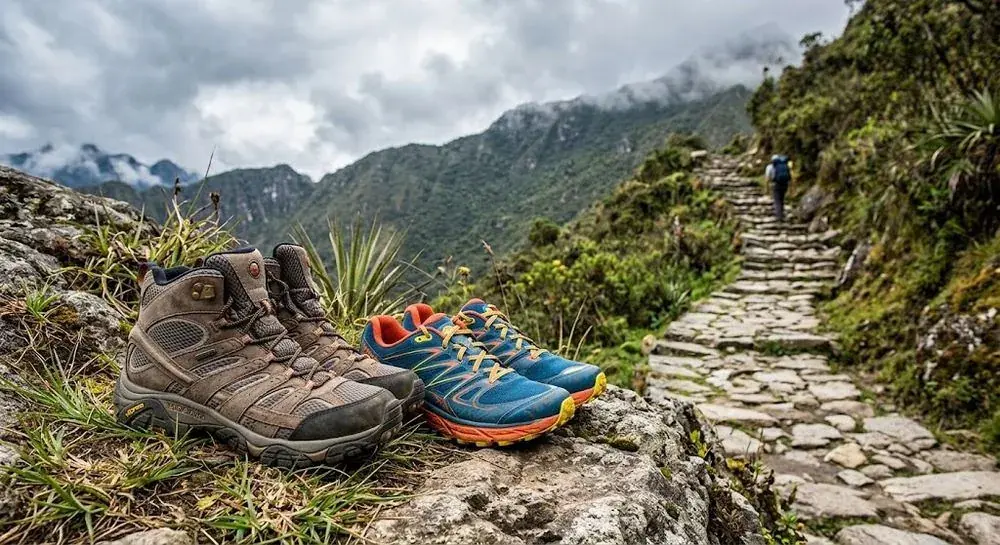
Your Footwear Can Change Your Experience
Four days of stone steps, mud and long descents.
Grip: a deep-lug sole holds on wet stone and mud.
Comfort: firm ankle support and room for your toes on long descents.
Break them in: wear them on several long hikes before your trip.
Footwear checklist
0 of 6
Your feet are ready for the trail.
Never wear brand-new hiking shoes for the first time on the Inca Trail. Break them in on several long hikes, with the socks you will wear.
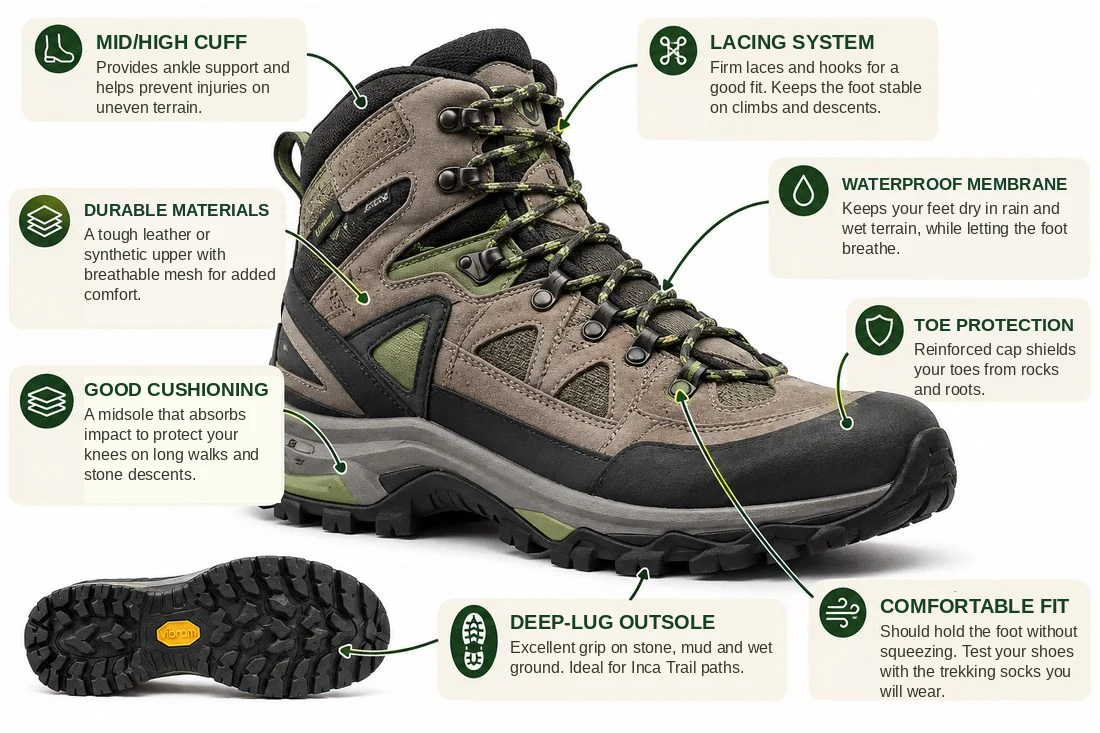
What to Look for in Hiking Footwear
1
Mid/high cuffSupports the ankle and helps prevent injuries on uneven ground.
2
Durable materialsLeather or synthetic, with breathable mesh for durability and comfort.
3
Good cushioningMidsole that absorbs impact and protects your knees on long stone descents.
4
Deep-lug soleExcellent grip on stone, mud and wet ground. Ideal for Inca Trail paths.
5
Lacing systemFirm laces and hooks for a secure fit. Keeps the foot stable on climbs and descents.
6
Waterproof membraneKeeps feet dry in rain and wet terrain, yet lets the foot breathe.
7
Reinforced toe capProtects your toes from knocks against rocks and roots on the trail.
8
Comfortable fitSnug without squeezing. Try boots with the socks you will actually wear.
Right trekking shoe
Urban shoe
Grip
Trekking sole with deep lugs
Smooth sole that slips on wet stone
Stability
Holds the foot and protects the ankle
Too soft or no support
Moisture
Waterproof or water-resistant
Soaked by the first drizzle
Comfort
Already worn and tested on hikes
Designed for walking in the city
Trekking Poles
Do I Need Trekking Poles?
Poles are optional, but most walkers are glad to have them.
They take pressure off your knees on the long stone descents and keep your rhythm steady on the climbs.
Support on descents: they share the impact and protect your knees.
Balance: they help you keep a steady rhythm on the climbs.
Stability: extra confidence on wet or uneven ground.
Required on this route: your poles must have rubber tips fitted. Poles are allowed on the Inca Trail trek with rubber tips, but not inside the Machu Picchu citadel.
How to Choose and Use Trekking Poles
1
GripErgonomic, cork or foam; absorbs sweat and does not slip.
2
Wrist strapRest your weight on the wrist, not only on the hand.
3
Correct lengthOn flat ground your elbow should be near 90°.
4
Adjustment systemShorter for climbing, longer for descending.
5
Weight and materialAluminum or carbon fiber: light and shock resistant.
6
Rubber tipMandatory on the Inca Trail: protects the stone and prevents slipping.
7
Bare metal tipDamages the stone and is usually not allowed through the checkpoint.
Allowed on the Inca Trail trek with rubber tips · not allowed inside the Machu Picchu citadel
How to use them
Set the length. Your elbows should be near 90° on flat ground.
Adjust on the go. Shorter for climbing, longer for descending.
Use the straps. Rest your weight on the wrist, not just your hand.
Weather
What Weather Will You Really Find?
On a single hike you pass through different ecological zones and conditions. SERNANP reports a rainy season from November to March, with large temperature swings depending on altitude.
Rainy season: November–March
Puna to cloud forest
01
Morning
Cool, with strong sun as soon as it rises. Start dressed in layers.
Cool air · strong sun
02
Midday
Warmer, with more radiation. Take off layers and use sunscreen.
Warmer · high radiation
03
Afternoon
Mist or rain is possible, especially in forest areas.
Mist or rain possible
04
Night
Cold at camp, even more so at altitude.
Cold · colder at altitude
The golden rule
Dress in layers. In a single day you can go from icy puna to cloud forest, so layers work better than one thick jacket.
Temperature shifts with altitude
Rain gear in your daypack
Conditions can change quickly
Altitude
Altitude on the Inca Trail
Place
Altitude
Cusco
3,399 m a.s.l. (11,152 ft)
Km 82 (Piskacucho), start of the trek
2,605 m a.s.l. (8,547 ft)
Wayllabamba, first campsite
2,941 m a.s.l. (9,649 ft)
Dead Woman’s Pass (Warmiwañusca), highest point
4,207 m a.s.l. (13,802 ft)
Inti Punku (Sun Gate)
2,738 m a.s.l. (8,983 ft)
Altitudes come from Santu’s own GPS trace; Cusco is the standard figure for the city.
The issue is not only being at altitude: how you arrived, how much you rested, how you hydrate and how you manage effort all matter. For that reason, arrive in Cusco with spare days. If you have a health condition, or take regular medication, ask your doctor before you travel, including whether altitude medication is right for you.
True or false? “I can acclimatize to the altitude in a single day in Cusco.”
False. We recommend at least one full day in Cusco or the Sacred Valley before you start, and more time if your schedule allows. One night’s sleep is not enough.
Places and Experiences
Moments You Should Not Miss
Llactapata
What to look at: The terraces and the open valley from above.
Photo tip: shoot a wide frame with the river in it.
Dead Woman’s Pass (Warmiwañusca)
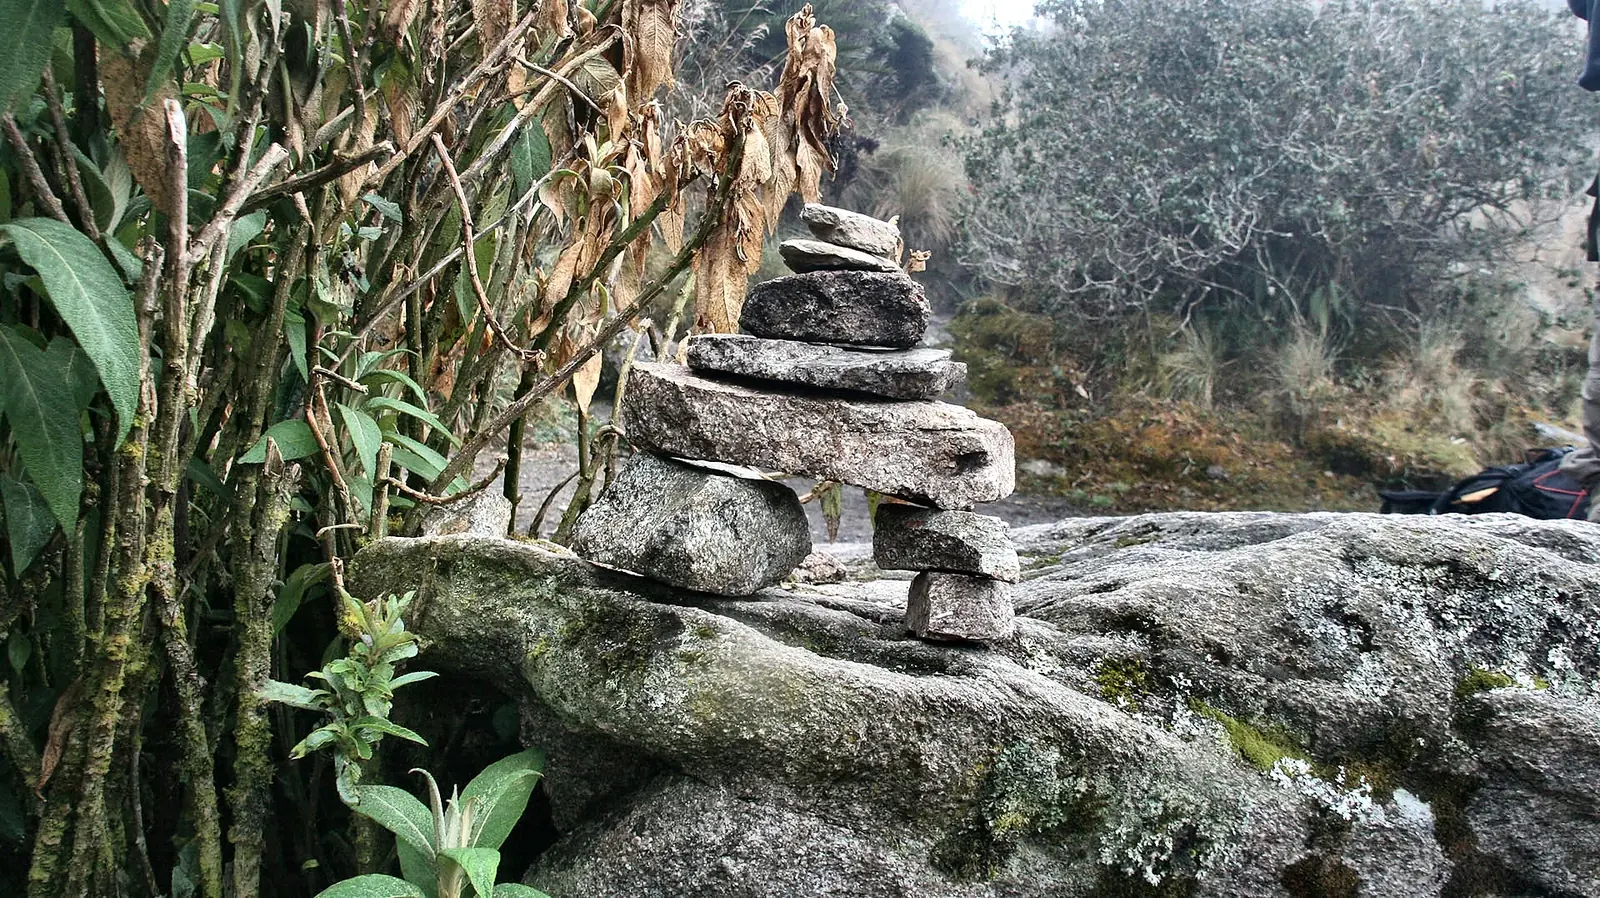
What to look at: The highest pass and the stone offerings left by travelers.
Photo tip: take your photo fast; the wind and cold do not forgive.
Runkurakay
What to look at: Its circular shape and the view of the trail.
Photo tip: climb to one side to show the scale of the site.
Sayaqmarka
What to look at: Its elevated, narrow position above the valley.
Photo tip: use the afternoon light if the sky opens.
Wiñay Wayna
What to look at: Its agricultural terraces on the mountainside.
Photo tip: take a group photo on the steps with the terraces behind you.
Inti Punku (Sun Gate)
What to look at: The first view of Machu Picchu from the Sun Gate.
Photo tip: turn to the rising sun, not only to the citadel.
Food
Fuel Your Inca Trail Adventure
Simple nutrition tips to help you feel your best on the trail.
Before You Hike
Eat a familiar, balanced breakfast before setting off. Include carbohydrates and some protein to help fuel your morning.
During the Hike
During the hike, bring energy bars, nuts, dried fruit and a few of your favorite sweets. Eat small amounts regularly rather than waiting until you feel exhausted.
Stay Hydrated
Also, bring a refillable water bottle on Day 1 so you can refill it during the trek. Drink regularly throughout the day. On long or demanding days, electrolyte drinks or oral rehydration products may be useful when appropriate.
After the Hike
Eat a balanced meal with carbohydrates, protein and vegetables to replenish energy and support recovery.
A little preparation goes a long way. Bring snacks you know your stomach tolerates, and don’t wait until you feel hungry or exhausted to eat.
Mistakes
The 10 Mistakes to Avoid
Wearing new shoes
Carrying too much weight
Walking too fast on Day 1
Not acclimatizing
Not protecting yourself from the sun
Not bringing rain protection
Not drinking water regularly
Not bringing a thermal layer
Underestimating the descents
Thinking the Inca Trail is “just walking”
True or false? “If I go slowly, I can make up the time by walking faster later.”
False. Speeding up to “make up time” is exactly mistake #3 on this list: it burns more energy than it recovers and you pay for it the next day.
Responsible Travel
Walk with Purpose
Respect the trail. Stay on marked paths.
Protect the heritage. Do not touch or climb the walls.
Respect wildlife and plants.
Look after water sources.
Reduce plastics. Avoid single-use items.
Respect porters and communities.
Photograph without altering the place.
Take your waste with you or leave it where it belongs.
Permits and Practical Notes
Permits and Practical Notes
Permits often sell out 3 to 6 months ahead. Book as early as you can.
You need your passport during the trek, and your personal data must match the permit reservation.
A student discount requires a valid student ID.
Campsites may vary under government regulations.
All times are approximate.
Huayna Picchu is not included (ticket USD 85 per person).
Want to see what the program includes, and what it doesn’t? The full details, prices and departure dates are on the program page.
To provide the best experience, we use technologies such as cookies to store and/or access device information. By consenting, we may process data such as browsing behavior or unique identifiers on this site. Refusing or withdrawing consent may negatively affect certain features and functionality.
Functional
Always active
Technical storage or access is strictly necessary to provide a specific service explicitly requested by the user, or solely to enable communication over an electronic communications network.
Preferencias
El almacenamiento o acceso técnico es necesario para la finalidad legítima de almacenar preferencias no solicitadas por el abonado o usuario.
Statistics
El almacenamiento o acceso técnico que es utilizado exclusivamente con fines estadísticos.Technical storage or access is used exclusively for anonymous statistical purposes. The information collected cannot normally be used to identify you.
Marketing
Technical storage or access is used to create user profiles, deliver relevant advertising, or track users across websites for similar marketing purposes.